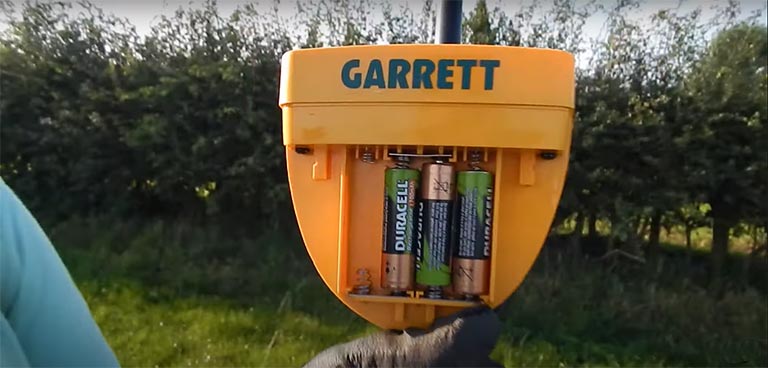
Before starting the Garrett Ace 250 battery cover removal procedure, we need to know where is the battery on a Garrett metal detector. Usually, you need to remove the battery cover when you need to replace the batteries. If you see the display of the metal detector showing 1 or 2 darkened squares in the battery charge indicator, it’s time to replace the batteries. Somebody says that the Garrett Ace 250 battery cover is hard to remove, but it is not. As a Garrett Ace 250 battery cover remover, anyone can do this job who is familiar with metal detectors or even has a common sense about battery-powered electronics devices.
Steps of Garrett Ace 250 battery cover removal
How do you change the battery of a Garrett Ace 250? Well here is the step-by-step guide for you:
Step 1: Lay down the metal detector on a plain surface.
Step 2: Hold the control housing of the metal detecting putting your 2 thumbs on the battery cover. (The battery cover is situated just under the LCD display of the metal detector.)
Step 3: Now slide down the battery cover with your thumbs gently. The battery cover will be removed.
Step 4: In this step, you can remove your old batteries and replace them with new batteries. Just place the batteries correctly with the “+” and “-” signs marked in the battery compartment.
Step-5: Once the battery is replaced perfectly, you can put back the battery cover.
FAQ:
Definitely, the Garrett Ace 250 metal detector is water-resistant.
Most of the Garret metal detector’s battery removal procedures are the same as the Garrett Ace 250 metal detector. You can follow the above step-by-step guide.
Metal detectors use dry cell batteries or button cell batteries. Besides these, alkaline batteries and Li-Ion batteries are also used for metal detectors.
Garrett Ace 250 metal detector uses 4 pieces of AA (Double-A) batteries. You can use rechargeable or non-rechargeable types of batteries for this metal detector.

I love all things tech, and I wear many hats – tech lover, business starter, digital marketer, and blogger. I know the ins and outs of Digital Marketing, SEO, SEM, SMM, and how to generate leads. My goal? Making things simple for you with clear guides and reviews. I stumbled upon WordPress while creating my first business site, and I fell in love with it right away. When I’m not building websites, creating content, or boosting clients’ online efforts, I’m focused on staying healthy, hanging out with family, and exploring the world. Connect with me on Facebook, Twitter, Linkedin, or read my complete biography.

