


Published on: September 22, 2025 | Updated on: September 22, 2025
Yes, you can make a basic metal detector, but understand its limitations compared to commercial units. This guide explores the feasibility, components, and steps involved in building your own, offering insights for hobbyists and curious minds.
Can I Make a Metal Detector? Your Essential DIY Guide
Ever found yourself wondering if you could build your own metal detector? It’s a question many budding treasure hunters and tech enthusiasts ponder, especially when looking at the cost of commercial units. The allure of creating something functional from scratch, especially a device that can uncover hidden objects, is undeniable. While the idea is exciting, it’s important to set realistic expectations. This guide will walk you through the feasibility, the core components, and the actual process of building a metal detector, giving you a clear picture of what’s involved and what you can expect from a DIY project.
Understanding the Core Principles of Metal Detection
Metal detectors work on a fundamental principle: electromagnetism. They generate an electromagnetic field and then detect disturbances in that field caused by metallic objects. This interaction creates a signal that the detector interprets and relays to the user. Understanding this basic physics is key to grasping how a DIY metal detector operates.
How Electromagnetic Fields Help Detect Metal

At its heart, a metal detector is a sophisticated electromagnetic device. It uses a transmitter coil to generate a magnetic field that extends into the ground. When this field encounters a metallic object, it induces eddy currents within that object. These eddy currents, in turn, generate their own magnetic field, which is then detected by a receiver coil in the detector.
The Role of Coils: Transmitter and Receiver
The coils are the lungs and ears of any metal detector. The transmitter coil, often called the search coil, is responsible for emitting the electromagnetic field. The receiver coil then picks up the faint signals returned by buried metal objects. The design and arrangement of these coils significantly impact the detector’s sensitivity and depth.
Is Building a Metal Detector Feasible for a DIYer?
The short answer is yes, but with significant caveats. Building a basic, functional metal detector is achievable for someone with a moderate understanding of electronics and a willingness to experiment. However, don’t expect a DIY unit to rival the performance, discrimination capabilities, or depth of a commercially manufactured detector. It’s more of an educational project than a tool for serious treasure hunting.
Complexity vs. Capability: What to Expect
A DIY metal detector will likely be a simple beat-frequency oscillator (BFO) or a very basic induction balance (IB) design. These types are easier to build but offer limited features. They will detect most common metals but will struggle with distinguishing between different types of metal or ignoring ferrous junk.
When to Consider a DIY Project
This type of project is ideal for students, hobbyists looking to learn about electronics, or anyone curious about the inner workings of metal detectors. It’s a fantastic way to gain hands-on experience without the significant investment of a professional unit. For serious hobbyists or professionals, purchasing a reputable commercial detector remains the most practical route.
Essential Components for Your DIY Metal Detector
To build your own metal detector, you’ll need a few key electronic components and some basic construction materials. The specific parts can vary depending on the circuit design you choose, but most will require a power source, oscillator circuits, coils, and some form of indicator. Gathering these items is the first concrete step in your build.
The Oscillator Circuit: The Heartbeat of Detection
The oscillator circuit is what generates the electromagnetic field. In simpler designs, like BFO detectors, two oscillators are used, one of which is affected by nearby metal. The difference in their frequencies creates an audible tone that changes when metal is detected. More complex designs use a single oscillator with a transmit and receive coil.
Coils: The Detectors of Metal
You’ll need to wind your own coils or source pre-wound ones. This involves carefully wrapping insulated wire around a form to create precise inductance. The size and number of turns directly affect the detector’s operating frequency and sensitivity. Many online resources provide detailed instructions for winding effective search coils.
Power Source and Indicator
A standard 9V battery is usually sufficient for most DIY metal detector circuits, making them portable and easy to power. For indicating a find, you can use a simple audio amplifier connected to a speaker or headphones. The pitch or volume of the sound will change when metal is detected, alerting you to a potential target.
Choosing a DIY Metal Detector Circuit Design
Several circuit designs are available for DIY metal detectors, ranging from extremely simple to moderately complex. The best choice for you will depend on your electronics knowledge, the tools you have available, and your desired level of performance. Researching these designs thoroughly before you start is crucial.
Beat Frequency Oscillator (BFO) Designs
BFO detectors are among the simplest to build. They use two oscillating circuits. One oscillator has a fixed frequency, while the other’s frequency is influenced by the presence of metal near its coil. The difference in their frequencies is amplified and produces an audible tone.
Pros: Easy to build, few components, great for beginners.
Cons: Poor discrimination, low depth, susceptible to ground mineralization.
Induction Balance (IB) Designs
IB detectors are more sophisticated and offer better performance. They typically use a transmit coil and a separate receive coil. The circuit is balanced so that when no metal is present, there is no output signal. Metal disrupts this balance, producing a detectable signal.
Pros: Better depth, can offer some discrimination capabilities.
Cons: More complex to build and tune, requires careful coil alignment.
Pulse Induction (PI) Designs
PI detectors are generally more advanced and are excellent for mineralized ground and gold prospecting. They send out short pulses of magnetic energy and measure the decay of the magnetic field in the target. Building a reliable PI detector is significantly more challenging for a beginner.
Pros: Excellent depth, works well in mineralized soils, good for small targets.
Cons: Complex circuitry, requires specialized components, often no discrimination.
Step-by-Step: Building Your Basic DIY Metal Detector
Embarking on building your own metal detector can be a rewarding experience. While the exact steps will depend on your chosen circuit, here’s a general outline of the process. Remember to consult detailed schematics and build guides for your specific design. Safety first, always ensure you understand the electronics before powering up.
Step 1: Gather Your Components and Tools
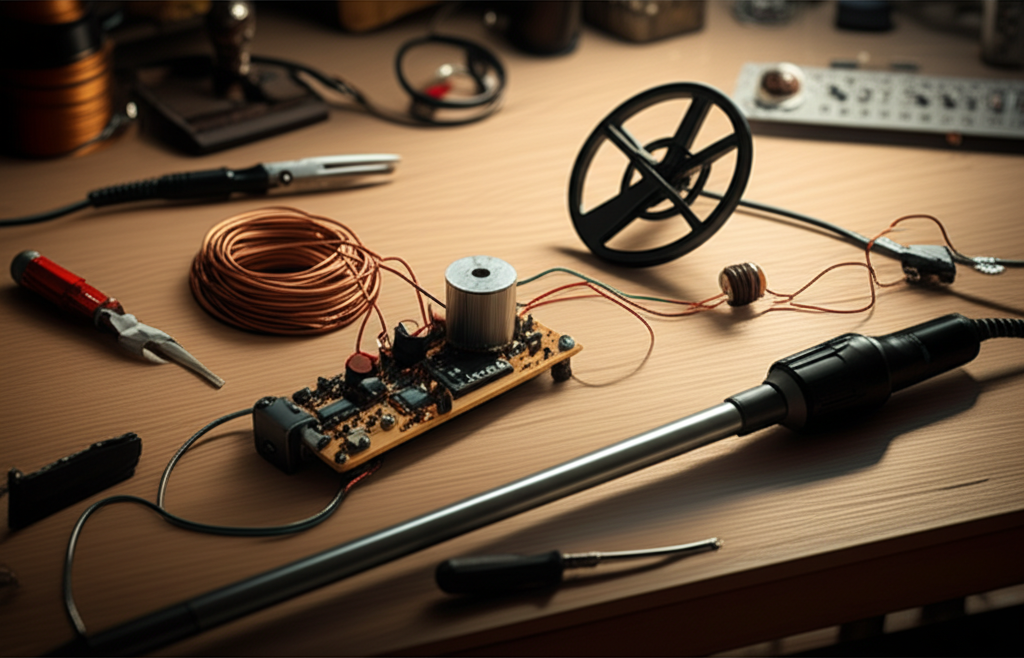
Before you start soldering, make sure you have all the necessary electronic components, such as resistors, capacitors, transistors, an integrated circuit (IC) if required, wire for coils, a battery, a speaker or headphone jack, and a suitable enclosure. You’ll also need tools like a soldering iron, wire strippers, pliers, a multimeter, and possibly a drill.
Step 2: Wind Your Search Coils
This is a critical step. You’ll need to wind the transmitter and receiver coils according to the specifications of your chosen circuit. Use a non-metallic form for winding. Carefully count the turns and ensure the windings are neat and consistent. Proper coil construction is paramount for the detector’s performance.
Step 3: Assemble the Circuitry
Follow your circuit diagram meticulously. Solder the components onto a perfboard or a custom-made printed circuit board (PCB). Double-check all connections for shorts or breaks. A clean, well-soldered circuit is less prone to issues and easier to troubleshoot.
Step 4: Construct the Housing and Handle
You’ll need a sturdy housing for the electronics and a handle with a mounting for the search coil. Many DIYers use PVC pipes, plastic project boxes, and wooden dowels or metal conduit for the handle. Ensure the search coil is securely mounted and can be adjusted for height.
Step 5: Connect and Test
Once the circuit is assembled and housed, connect the battery and the speaker/headphone output. Power up the device and test its functionality. For BFO circuits, you’ll tune the oscillators to achieve a specific tone. For IB circuits, you’ll balance the coils. Use known metal objects to test its detection capabilities.
Testing and Tuning Your Homemade Metal Detector
After assembly, the real work of making your DIY metal detector functional begins: testing and tuning. This phase requires patience and a systematic approach to ensure you get the best possible performance from your creation. It’s where you translate theory into practice, making fine adjustments that can significantly impact detection.
Initial Power-Up and Basic Checks
When you first power on your detector, listen for any unusual sounds like high-pitched squeals or crackling, which could indicate a problem. Use your multimeter to check voltages at key points in the circuit against the schematic. Ensure the battery is providing adequate power and that there are no short circuits.
Tuning the Oscillators (for BFO designs)
For BFO detectors, tuning involves adjusting potentiometers to set the frequency difference between the two oscillators. You’ll typically aim for a low hum or silence when no metal is present. Bringing a metal object near the coil should then cause the pitch of the tone to rise.
Balancing the Coils (for IB designs)
Induction balance detectors require careful balancing of the transmit and receive coils. This is often done by adjusting the physical position of the coils or by using a potentiometer in the circuit. The goal is to achieve a null state where the detector outputs no signal. Any nearby metal will then break this null.
Ground Balancing (if applicable)
Some DIY circuits may incorporate a rudimentary ground balancing feature. This helps to reduce signals caused by minerals in the soil. Adjusting this setting minimizes false signals from the ground itself, allowing you to focus on actual metallic targets.
Limitations of DIY Metal Detectors Compared to Commercial Units
It’s crucial to understand that a homemade metal detector, while a fantastic learning project, will likely not match the performance of a store-bought unit. Commercial detectors are the result of extensive research, development, and specialized manufacturing processes. Recognizing these limitations will help manage expectations and appreciate the DIY effort.
Depth and Sensitivity
Commercial detectors often boast significantly greater detection depths due to optimized coil designs, advanced circuitry, and powerful processors. Your DIY unit will likely detect targets only at shallow depths, especially for smaller items. Sensitivity is also a key differentiator; higher-end detectors can pick up very small pieces of metal.
Discrimination Capabilities
One of the biggest advantages of modern metal detectors is their ability to discriminate between different types of metal. They can be programmed to ignore iron junk while signaling valuable targets like coins and jewelry. Most DIY circuits lack sophisticated discrimination, meaning you’ll likely dig up a lot of rusty nails.
Ground Mineralization and Interference
The earth itself contains minerals that can interfere with a metal detector’s signal, leading to false positives. Professional detectors have advanced ground balancing features to counteract this. Simpler DIY circuits are often highly susceptible to ground mineralization, making them difficult to use in many environments.
User Interface and Features
Commercial detectors come with user-friendly interfaces, digital displays, multiple search modes, and target ID numbers. Your DIY detector will likely have a very basic audio output and perhaps a simple analog meter. This makes interpretation of signals much more challenging.
Alternative Approaches: Kits and Upgrading Existing Detectors
If you’re keen on building something but find the idea of designing a circuit from scratch daunting, there are alternatives. Metal detector kits offer a middle ground, providing all the necessary components and instructions for a specific, tested design. You can also explore upgrading components on a basic commercial detector.
Metal Detector Kits: A Structured Build
Several companies offer metal detector kits that range from very simple to more advanced. These kits typically include a PCB, all electronic components, coils, and a manual. They take the guesswork out of component selection and circuit design, allowing you to focus on assembly and soldering.
Pros: Proven designs, detailed instructions, often good value.
Cons: Less customization, still requires electronics knowledge.
Upgrading Commercial Detectors
For those who already own a basic metal detector, upgrading can be an option. This might involve replacing the stock coil with a more sensitive aftermarket coil or adding a better battery system. These modifications can enhance performance without requiring a full build.
When to Buy Instead of Build
While building a metal detector is a fantastic educational project, there are clear scenarios where purchasing a commercial unit is the far more practical choice. If your primary goal is serious treasure hunting, relic hunting, or gold prospecting, investing in a reliable, high-performance detector is essential. The time and effort invested in a DIY build might not yield the results you desire for serious fieldwork.
For Serious Hobbyists and Professionals
If you spend significant time metal detecting or aim to find valuable items, the capabilities of a commercial detector are indispensable. Features like accurate target identification, superior depth, and effective discrimination are crucial for maximizing finds and minimizing wasted time digging trash. These advanced features are difficult and expensive to replicate in a DIY project.
Budget Considerations for DIY vs. Commercial
While the initial component cost for a DIY detector might seem low, factor in tools, potential mistakes, and the limited performance. For a similar price range to a decent kit, you can often find entry-level commercial detectors that offer far superior functionality and reliability. The long-term value and usability often lean towards buying.
The Future of DIY Metal Detection
As technology advances, the possibilities for DIY electronics continue to expand. Microcontrollers and more accessible sensor technologies could pave the way for more sophisticated homemade metal detectors in the future. Imagine a DIY unit with basic digital displays or even rudimentary target ID, all programmed by the user.
Leveraging Microcontrollers for Enhanced Features
With the rise of platforms like Arduino and Raspberry Pi, it’s becoming increasingly feasible to build metal detectors with digital capabilities. These microcontrollers can process signals from the coils, drive small LCD screens for target information, and even incorporate programmable discrimination algorithms. This opens up a new frontier for ambitious DIYers.
Community and Open-Source Designs
The maker community and open-source hardware movement are invaluable resources for DIY electronics projects. Online forums and repositories are filled with shared schematics, build logs, and troubleshooting advice for metal detector projects. Collaborating with others can accelerate learning and improve project outcomes.
Conclusion: Your Metal Detecting Journey Starts Here
So, can I make a metal detector? Absolutely, you can build a functional metal detector, and it’s a deeply rewarding project for anyone interested in electronics and the thrill of discovery. However, it’s vital to approach it with the right expectations. A DIY metal detector is an excellent learning tool and a testament to your ingenuity, but it won’t replace a high-performance commercial unit for serious detecting. If your goal is to uncover historical relics, valuable coins, or gold nuggets, investing in a reputable commercial detector is likely the most efficient path. But if you’re driven by curiosity and the desire to understand how these devices work from the ground up, the DIY route offers an unparalleled educational experience. Your journey into metal detecting, whether built or bought, promises adventure and the excitement of finding what lies hidden beneath.
Frequently Asked Questions (FAQ)
Can I make a metal detector that finds gold?
Building a DIY metal detector capable of reliably finding gold is significantly more challenging. Gold prospecting requires detecting very small targets, often in highly mineralized soil. While a basic DIY unit might detect larger gold pieces, it won’t match the specialized performance of commercial gold detectors.
What is the simplest metal detector circuit to build?
The Beat Frequency Oscillator (BFO) circuit is generally considered the simplest metal detector to build. It uses basic electronic components and is forgiving for beginners, making it a popular choice for first-time builders.
How deep can a homemade metal detector find things?
The detection depth of a homemade metal detector is typically quite limited, often only a few inches to a foot at most, depending heavily on the design, coil size, and target size. Commercial detectors can achieve depths of several feet for larger objects.
Do I need special tools to build a metal detector?
You’ll need basic electronics tools like a soldering iron, wire strippers, pliers, and a multimeter for testing. A drill might be necessary for creating holes in the housing. Specific tools will depend on the complexity of your chosen design.
Is it cheaper to build a metal detector than to buy one?
For a very basic, low-performance detector, the component cost might be less than the cheapest commercial units. However, if you factor in tools, potential mistakes, and the significant performance difference, buying an entry-level commercial detector is often more cost-effective for practical use.
Where can I find schematics and instructions for DIY metal detectors?
Numerous websites, electronics hobbyist forums, and maker communities offer free schematics, build guides, and tutorials for DIY metal detector projects. Searching online for “DIY metal detector circuit” or “homemade metal detector plans” will yield many results.
