


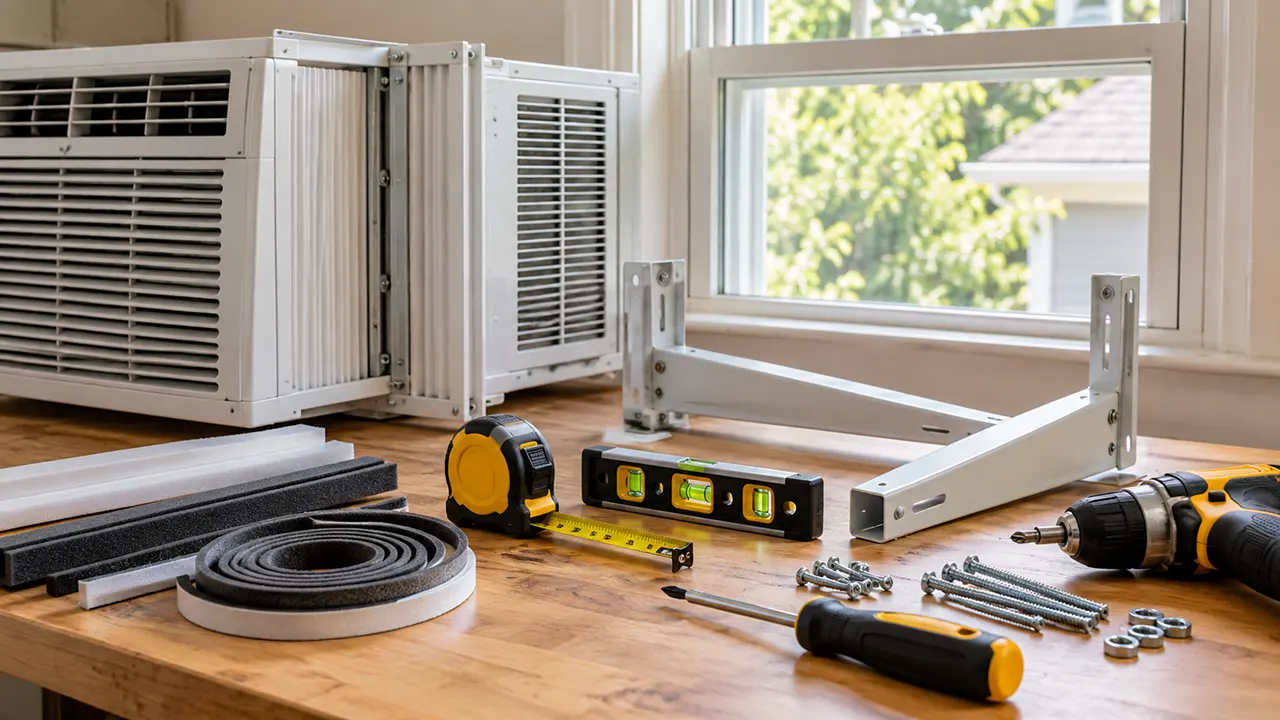
Window Air Conditioner installation tools include a tape measure, level, screwdriver, and any drill or drill bits required by the manufacturer’s instructions. You may also need compatible mounting hardware, a support bracket, foam seals, and weatherstripping. The exact list depends on your air conditioner’s installation kit, window construction, and support requirements.
Installing a window air conditioner is not just a matter of fitting it into an opening. The unit must remain secure, the window must be in good condition, and the electrical supply must meet the manufacturer’s requirements.
This guide explains which tools to prepare, how to choose suitable mounting hardware, and what to check before you buy anything.
Affiliate disclosure: ToolGuider may earn a commission from qualifying purchases made through affiliate links in this article, at no additional cost to you. Product links will be added only after the relevant products and approved affiliate URLs have been verified.
Which Window Air Conditioner installation tools Do You Need?
Most standard window AC installations require a small collection of measuring and hand tools. A drill is necessary only when the installation instructions call for it, while some support brackets are designed to install without drilling.
GE Appliances lists a Phillips screwdriver, drill with a 1/8-inch drill bit, pencil, tape measure, level, and scissors or a knife among the tools needed for one of its window AC installation procedures. Your model may require a different selection. GE Appliances’ installation instructions are a useful example of why you should check the manual before preparing your tools. Installing Into a Window
Essential measuring and hand tools
| Tool | What it does | Essential or optional? |
|---|---|---|
| Tape measure | Checks the window opening and available clearance | Essential for verifying fit |
| Bubble or torpedo level | Checks alignment according to the installation instructions | Usually essential |
| Phillips screwdriver | Tightens screws supplied with the AC or mounting kit | Commonly essential |
| Pencil | Marks measurement points and permitted drilling locations | Useful |
| Scissors or utility knife | Trims foam seals and weatherstripping | Needed if trimming is required |
| Drill and compatible drill bits | Creates pilot holes where the instructions permit or require them | Conditional |
| Adjustable wrench or pliers | Tightens compatible nuts and bolts | Conditional |
Do not assume you need to buy every item on this list. Check the AC installation kit first. Some models include mounting rails, screws, locking brackets, side panels, and sealing strips, which can reduce the number of additional purchases.
Tools needed only for certain windows
A cordless drill may be helpful for a compatible wood frame, but it is not a universal requirement. Some support brackets use an adjustable, tool-free design, while other mounting systems require fasteners secured to an appropriate structural surface.
You may also need a stud finder or other inspection equipment when the mounting instructions require locating suitable structural material. Use such tools only when relevant to the actual installation design.
If your window frame is damaged, loose, or unsuitable for the mounting system, buying more tools will not solve the underlying problem. Have the window assessed or repaired before installing the AC.
How to Choose the Right Window AC Support Bracket
A window AC support bracket helps transfer some or all of the unit’s load away from vulnerable parts of the window, depending on its design and installation. Whether you need an additional bracket depends on the AC manufacturer’s instructions, the supplied mounting system, the window construction, and applicable building requirements.
For example, New York City’s Department of Buildings advises that support structures must be securely fastened to the building and strong enough for the air conditioner’s size and weight. Its guidance also warns against using loose objects as makeshift supports. Read the NYC installation guidance. Buildings
No-drill vs. screw-mounted support brackets
A no-drill bracket may suit a renter or homeowner who wants to avoid making holes, but only if the window geometry and mounting surface match the product’s requirements. A screw-mounted bracket may be appropriate where the manufacturer permits it and the fasteners can be secured to a suitable structural surface.
Neither design is automatically safer for every window. A high advertised weight capacity does not prove that a bracket is compatible with a particular sill, frame, wall thickness, or AC unit.
Before choosing a bracket, check:
- The AC’s actual weight, not just its BTU rating.
- The bracket’s documented load capacity and compatible mounting surfaces.
- Window width, sill depth, wall thickness, and frame construction.
- Whether the design requires drilling, particular fasteners, or an exterior ledge.
- The AC manufacturer’s installation instructions and local building requirements.
Window AC support brackets worth considering
A window AC support bracket helps carry the unit’s weight and can reduce the load on the window sash. The right bracket depends on your AC’s weight, window design, sill material, and the manufacturer’s installation instructions. Here are three options to consider for a typical window AC installation.
1. Ivation Window AC Support Bracket – 200 lb Capacity
The Ivation bracket is a heavy-duty steel support designed for window air conditioners weighing up to 200 pounds. Its no-drill design may appeal to homeowners who want to avoid drilling into the exterior wall.
Why consider it:
- Supports a stated maximum load of 200 pounds.
- Uses a no-drill mounting design.
- Provides additional support beneath the window AC unit.
Before buying: Check the bracket’s installation requirements and confirm that your window frame, sill, and exterior wall are compatible. A no-drill design does not mean it works with every window.
2. Adjustable No-Drill Window AC Support Bracket — 300 lb Capacity
This adjustable bracket is advertised with a maximum load capacity of 300 pounds. It may be worth considering if you need a higher-capacity support option, particularly for a heavier window AC unit.
Why consider it:
- Advertised maximum load of 300 pounds.
- Adjustable design for positioning the support.
- No-drill installation approach.
Before buying: Treat the 300-pound figure as a product rating, not a guarantee that the bracket will work with your specific window. Verify the current manufacturer’s specifications, window compatibility, installation method, and any restrictions on sill materials.
3. Mighty Bracket Mini-Split Wall Mounting Support Tool
This product is designed to support an indoor ductless mini-split air conditioner during installation. It is included here as a related HVAC installation tool, not as a substitute for a window AC support bracket.
Who should consider it: HVAC installers working with indoor mini-split units who need help supporting the equipment during mounting.
Important: Do not use this tool to support a window air conditioner unless the manufacturer explicitly approves that application.
Which bracket should you choose?
For a standard window AC installation, start by comparing the Ivation bracket and the adjustable 300-pound bracket. Check the actual weight of your AC, the bracket’s installation instructions, and your window’s construction before choosing. A higher stated load capacity alone does not make a bracket the best fit.
Safety tip: Follow the AC manufacturer’s installation manual and the bracket manufacturer’s instructions. Make sure the unit is securely supported, properly tilted if required, and protected against falling. Never assume a no-drill bracket is suitable for your window without checking compatibility.
Measure Your Window Before Buying Installation Hardware
Measure the window before ordering a support bracket or replacement mounting kit. The usable opening, sill depth, wall thickness, and frame design can determine whether a product fits, even when its advertised weight capacity appears sufficient.
Measure the opening and available clearance
- Measure the clear width of the window opening at the location where the AC will sit.
- Measure the vertical opening available when the sash is raised.
- Check the sill depth and the thickness of the wall or frame where the bracket will rest.
- Compare those measurements with the AC manual, side-panel dimensions, and bracket specifications.
Do not rely on nominal window sizes. Two windows described as the same size can have different usable openings or sill designs.
Check the sill, sash, and frame
Inspect the wood, vinyl, aluminum, or other window materials for cracks, rot, looseness, and other damage. Pay special attention to the surface that will carry the appliance or receive fasteners.
A tape measure can confirm dimensions, but it cannot establish that a damaged frame is structurally sound. If the sill moves, the frame is deteriorated, or the intended mounting surface cannot be verified, stop and get the window assessed before installation.
Identify incompatible window types
Many standard window AC kits are designed for conventional single-hung or double-hung windows. Casement, sliding, unusually shaped, and other nonstandard windows may require a specifically approved solution or a different type of air conditioner.
Do not modify a standard mounting kit simply to make it fit. Confirm the manufacturer’s permitted installation method for your window type before buying additional hardware.
Which Mounting Hardware and Fasteners Do You Need?
The required mounting hardware depends on the AC model and whether you are using its supplied kit or a compatible separate support bracket. Start by checking the parts list in the installation manual, then buy only the missing components specified for your setup.
Manufacturer-supplied installation kits
A window AC installation kit may contain:
- A top mounting rail and side guide panels.
- Screws and other specified fasteners.
- Window locking brackets or angle brackets.
- Foam seals and weatherstripping.
- Other model-specific mounting components.
For example, LG’s window AC installation guidance identifies a screwdriver, scissors, pencil, ruler, hammer, and level among the tools needed for its documented procedure. The installation kit and exact hardware depend on the model. LG USA Support
Lay out the supplied parts before starting. This makes it easier to identify missing pieces and avoid purchasing a generic kit that does not fit the unit.
Screws, rails, and replacement fasteners
Use the fastener types and sizes specified by the manufacturer or the approved bracket instructions. Screw length, diameter, thread type, and the material receiving the fastener all matter.
Do not replace a specified structural fastener with an arbitrary screw simply because it fits the hole. If a required fastener is missing, obtain a correct replacement from the manufacturer or a qualified supplier.
How to Seal a Window AC Installation Properly
Foam gaskets and weatherstripping help close gaps around the installed unit. They improve the seal between the AC, window, and side panels, but they are not structural supports.
Foam gaskets and weatherstripping
Use the sealing materials specified in the AC installation manual. Some units include foam strips for the upper and lower sash, while others use additional sealing pieces around the mounting rails or side panels.
A utility knife or scissors may be needed to trim a seal to length. Avoid cutting away material that the manufacturer intends to remain in place.
Seal side-panel gaps
After the AC is secured, check the side panels and the joints between the window sash and frame. Install the supplied seals as instructed and close any permitted gaps with compatible weatherstripping.
Do not use expanding foam, adhesive, or improvised filler in a way that blocks drainage, interferes with moving window parts, or makes seasonal removal unsafe. If a gap is too large for the supplied materials, use a manufacturer-approved sealing solution.
Electrical and Structural Safety Checks Before Installation
The most important pre-installation check is whether the window, mounting system, and electrical supply can safely accommodate the specific AC unit. If any of these conditions cannot be verified, do not proceed with installation.
Verify the window and support structure
Confirm that the frame is sound and that the approved mounting hardware can be attached as instructed. Where a separate support bracket is required, verify that the bracket, fasteners, and mounting surface form a suitable support system.
The NYC Department of Buildings’ installation guidance also recommends securing leveling components against movement and ensuring that the installed unit remains in place. Avoid loose bricks, scraps of wood, or other improvised supports. Buildings
Check the outlet and circuit requirements
Read the AC’s nameplate and manual to confirm the required voltage, current, plug type, and circuit conditions. Do not assume that a standard-looking outlet is sufficient for every unit.
- Use the electrical supply specified by the manufacturer.
- Do not remove the grounding pin or modify the plug.
- Do not use an extension cord or adapter unless the manufacturer explicitly permits the arrangement.
- If the outlet, wiring, or circuit appears damaged or inadequate, have a qualified electrician assess it before connecting the unit.
A drill and screwdriver cannot correct an unsuitable electrical supply.
Plan safe lifting and handling
Window AC units can be heavy and awkward to balance. Arrange help from another person when the manufacturer’s instructions or the unit’s size and handling requirements call for it. Keep the area below the window clear, and never lean out of an open window to handle the appliance.
If you cannot lift and position the unit safely while maintaining control of it, use a qualified installer.
Know when professional installation is the better choice
Seek professional assistance if the window frame is damaged, the mounting surface is uncertain, the window type is not covered by the manual, or the installation requires structural alterations or electrical work beyond your competence.
Renters should also obtain any required permission from the property owner or building management before making changes to the window or exterior.
Window AC Installation Checklist: What to Verify Before You Start
Use this checklist before buying additional tools or beginning installation.
Pre-installation checklist
0 of 10Read the AC manufacturer’s installation manual.Measure the usable window opening and check bracket dimensions.Inspect the sill, sash, frame, and mounting surface for damage.Confirm the AC weight and the bracket’s documented load capacity.Check which tools, fasteners, and seals are already included.Verify that the mounting hardware suits the window construction.Confirm the outlet and circuit meet the AC’s electrical requirements.Arrange safe lifting assistance if needed.Check building rules and obtain any required permission.Stop if structural support or electrical safety cannot be verified.
Reset checklist
The checklist is a preparation aid, not proof that an installation is safe. The manufacturer’s instructions and applicable building requirements take precedence.
Frequently Asked Questions
1. What tools do I need to install a window air conditioner?
Most standard installations use a tape measure, level, screwdriver, pencil, and scissors or a knife for trimming seals. Some models also require a drill and compatible drill bits. Check your exact AC manual because the required tools and mounting hardware vary by model.
2. Can I install a window AC without a drill?
Yes, some window AC support brackets are designed for tool-free installation, including the BLACK+DECKER BAB-2438. However, a no-drill bracket must be compatible with the window’s dimensions, mounting surface, and AC weight. The AC’s own installation instructions may still require tools or fasteners for other parts of the installation.
3. Do all window air conditioners need a support bracket?
Not every model or installation uses a separate, aftermarket bracket. Some AC units include mounting hardware designed for the intended window, while local rules or the manufacturer’s instructions may require additional support. Determine the required support system for your specific unit and window rather than assuming one solution works for every installation.
4. Can I install a window AC in a vinyl window?
Possibly, but the answer depends on the window’s design, structural condition, and the AC manufacturer’s approved installation method. Vinyl windows vary, and a bracket that fits one design may not fit another. Confirm compatibility with the window manufacturer or a qualified installer before drilling, fastening, or placing the AC’s weight on the frame.
5. How do I know if my window sill can support an air conditioner?
Inspect the sill and frame for damage, movement, rot, cracks, or loose components. Then verify the intended load path and mounting requirements against the AC and bracket instructions. A visual inspection alone cannot establish a safe load capacity. If the supporting structure is questionable, have it assessed before installing the unit.
6. Do window AC units come with mounting hardware?
Many window AC units include a mounting kit with components such as screws, rails, side panels, locking brackets, and seals. The exact contents vary by model, and some installations require a separate support bracket. Check the manufacturer’s parts list before purchasing replacements so you do not buy incompatible or duplicate hardware.
7. What electrical requirements should I check before installation?
Check the AC nameplate and manual for voltage, current, plug configuration, and circuit requirements. Confirm that the existing outlet and electrical supply are suitable. Do not modify the plug or use an extension cord unless the manufacturer expressly permits it. Have a qualified electrician resolve any uncertainty about the circuit or wiring.
Choose Your Tools Before You Start
The best window AC installation setup is the one that matches your appliance, window, and manufacturer’s instructions. Begin by measuring the opening, inspecting the supporting structure, and checking the included installation kit. Then purchase only the compatible tools and mounting hardware that are actually missing.
