


Published on: September 19, 2025 | Updated on: September 19, 2025
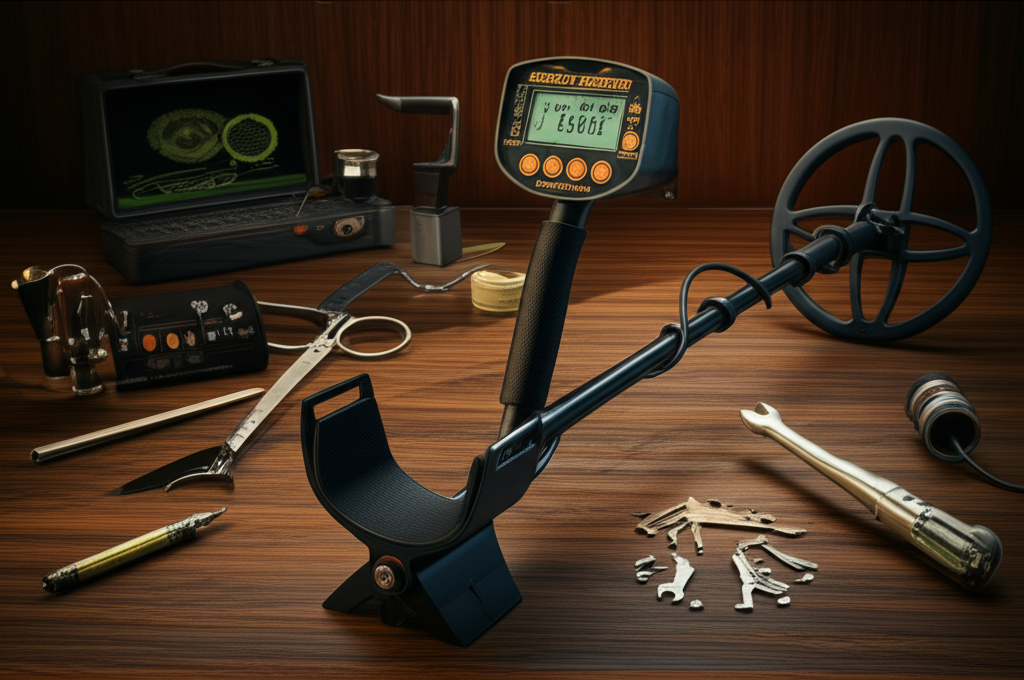
The Bounty Hunter 1500 metal detector is a fantastic entry-level option for treasure hunters, offering simplicity and effective detection for coins, relics, and jewelry. This guide unlocks its full potential, ensuring you maximize your finds and enjoy the thrill of discovery.
Metal detecting can be an incredibly rewarding hobby, but choosing the right gear can feel overwhelming. Many beginners find themselves drawn to accessible models like the Bounty Hunter 1500, yet wonder if they’re truly getting the most out of it. Frustration can set in when targets seem elusive or when the detector’s signals are confusing. Don’t worry; this guide is here to demystify the Bounty Hunter 1500 and turn you into a more successful treasure hunter. We’ll cover everything from setup to advanced techniques.
Bounty Hunter 1500 Metal Detector: Your Gateway to Hidden Treasures
The Bounty Hunter 1500 metal detector is a popular choice for those new to the hobby. It strikes a great balance between ease of use and performance, making it ideal for hunting coins, relics, and jewelry in various environments. Understanding its features is key to unlocking its full potential.
Unboxing and First Impressions: What’s in the Box?

When your Bounty Hunter 1500 arrives, you’ll typically find the main control box, the search coil, and a shaft that connects them. Assembly is usually straightforward, requiring no special tools. It’s designed to get you out detecting as quickly as possible.
Getting Started: Assembly and Initial Setup
Putting together your Bounty Hunter 1500 is a breeze. The shaft sections usually click together, and the coil attaches to the bottom. Once assembled, you’ll need to install batteries, typically two 9-volt ones.
Understanding Your Bounty Hunter 1500: Key Features Explained
The Bounty Hunter 1500 boasts a user-friendly interface with essential controls. You’ll find a power switch, sensitivity adjustment, and discrimination settings. The target indicator and depth indicator on the display are crucial for interpreting signals.
Power Switch: Simple on/off control.
Sensitivity: Adjusts how deep the detector can “see” and its susceptibility to interference.
Discrimination: Allows you to ignore common trash items like iron nails or pull tabs.
Target Indicator: A visual meter that shows the likelihood of a target’s identity.
Depth Indicator: Estimates how deep the detected object is.
These features work together to guide you towards valuable finds while helping you bypass unwanted junk. Understanding each one is the first step to successful detecting.
Mastering the Controls: Sensitivity and Discrimination
The sensitivity and discrimination controls are your primary tools for fine-tuning the Bounty Hunter 1500’s performance. Learning to use them effectively will dramatically improve your find rate and reduce frustration with trash targets.
The Art of Sensitivity: Finding the Sweet Spot
Sensitivity determines how much ground the detector can cover and how deep it can detect. Setting it too high can lead to erratic signals from electrical interference or mineralized soil. Setting it too low means you’ll miss deeper targets.
Best Practice for Sensitivity: Start with the sensitivity knob turned all the way up. If you experience constant chattering or false signals, gradually decrease it until the signals become stable. A slight, occasional chirp is acceptable.
Discrimination: Tuning Out the Junk
Discrimination is what allows you to ignore common metallic trash. The Bounty Hunter 1500 offers adjustable discrimination levels. This feature is crucial for efficient hunting, especially in areas with a lot of modern debris.
Understanding Discrimination Settings:
Low Settings: Will detect most metals, including iron.
Mid Settings: Can often ignore iron and some foil.
High Settings: May start to exclude desirable targets like small gold rings or thin silver.
Many detectorists prefer to run discrimination at a moderate level and learn to identify different target tones, rather than relying solely on the discrimination setting. This allows for more flexibility and can help you uncover overlooked items.
Choosing the Right Search Coil for Your Bounty Hunter 1500
While the Bounty Hunter 1500 typically comes with a standard coil, exploring different coil sizes and types can significantly enhance its capabilities for specific detecting scenarios. The coil is essentially the “eyes” of your metal detector.
Standard Coil Benefits and Limitations
The coil that comes with the Bounty Hunter 1500 is usually an 8-inch concentric coil. This is a versatile coil, good for general-purpose detecting, offering a decent balance of depth and target separation. It performs well in moderately trashy areas.
When to Consider an Aftermarket Coil
If you frequently hunt in areas with a lot of small, closely spaced targets or deep targets, an aftermarket coil might be beneficial. Smaller coils offer better target separation, while larger coils provide greater depth.
Smaller Coils (e.g., 6-inch): Excellent for highly trashy sites and separating closely buried targets. They are lighter and more maneuverable.
Larger Coils (e.g., 10-inch or more): Provide increased depth penetration, ideal for open fields or searching for deeper relics. However, they can be heavier and less sensitive to small targets.
Always ensure that any aftermarket coil you consider is compatible with the Bounty Hunter 1500. Check manufacturer specifications before purchasing.
Decoding the Signals: Tones and Target ID
Understanding the audio and visual cues from your Bounty Hunter 1500 is fundamental to identifying what lies beneath the surface. Different metals produce different tones and target IDs, which become clearer with practice.
Interpreting Audio Tones
The Bounty Hunter 1500 uses a multi-tone audio system. Generally:
Low Tones (often a rough, choppy sound): Typically indicate iron or highly oxidized targets.
Mid Tones (often a clear, consistent tone): Usually suggest pull tabs, foil, or small coins.
High Tones (a clear, bell-like sound): Often indicate desirable targets like nickels, dimes, quarters, or silver.
Listen carefully to the quality and consistency of the tone. A sharp, repeatable tone is usually a good sign.
Understanding the Target Indicator
The target indicator on the Bounty Hunter 1500 display provides a visual representation of the detected metal’s conductivity. While not always precise, it offers a helpful clue. Different segments or numbers on the meter correspond to different types of metals.
Lower readings: Often correspond to iron and foil.
Mid-range readings: Might be aluminum, zinc, or copper.
Higher readings: Usually indicate silver or higher-grade copper coins.
It’s crucial to remember that target IDs can be affected by target depth, orientation, and surrounding soil conditions. Always try to dig targets that give a repeatable, clear signal, even if the ID is not perfect.
Essential Accessories for the Bounty Hunter 1500 User
To truly maximize your success with the Bounty Hunter 1500, a few key accessories can make a world of difference. These tools enhance your detecting experience and improve your recovery rate.
The Indispensable Pinpointer
A good pinpointer is arguably the most important accessory for any metal detectorist. It helps you quickly and accurately locate a target within the plug of soil you’ve removed from the ground. This saves immense time and reduces the risk of damaging your finds.
How it Works: Pinpointers are small, handheld devices that emit a beep or vibration that intensifies as you get closer to the target.
Why You Need One: Without a pinpointer, digging a small coin or ring from a plug of dirt can be incredibly time-consuming and frustrating.
Look for a reliable pinpointer that offers both audible and vibratory alerts for versatility.
Digging Tools: More Than Just a Shovel
You’ll need robust digging tools that can handle various soil types without damaging your finds or your detector. A sturdy trowel or a dedicated digging spade is essential.
Trowels: Great for parks and areas with less dense soil.
Dedicating Digging Spades: Offer more leverage and are better for harder ground or cutting clean plugs.
Always practice making clean, neat plugs when digging. This helps preserve the ground and makes refilling easier, which is crucial for responsible detecting.
Other Useful Gear
Headphones: Essential for hearing faint signals and for privacy in public areas.
Carry Bag: Protects your detector when not in use and for transporting it.
Gloves: Protect your hands during digging.
Investing in a few key accessories will elevate your detecting game and make every outing more productive.
Where to Hunt: Finding Productive Locations
The success of your metal detecting adventures with the Bounty Hunter 1500 heavily depends on choosing the right locations. Understanding where to look can turn a day of frustration into a treasure trove.
Public Parks and Playgrounds
These are often excellent starting points for beginners. Over decades, coins and jewelry are inevitably lost by visitors. The Bounty Hunter 1500 is well-suited for finding these common targets.
Focus Areas: Around benches, picnic tables, pathways, and where children play.
Best Times: Early mornings or late afternoons when fewer people are around.
Always check local ordinances regarding metal detecting in public parks. Many areas permit it, but some have restrictions.
Old Home Sites and Historical Areas
Detecting around old home sites (with permission, of course) can yield fascinating relics and older coins. These locations require more research and careful detecting to avoid damaging fragile items.
Research: Look for old maps or historical records to identify former dwellings.
Caution: Old sites can be trashy and may contain fragile artifacts that require careful excavation.
The Bounty Hunter 1500’s discrimination can help filter out some of the modern junk, but learn to recognize the tones of older metal targets.
Beaches and Waterlines
Beaches are fantastic places to find lost jewelry and coins, especially in the wet sand near the waterline where items can be washed into the sand.
Coil Considerations: A smaller coil can be advantageous on a busy beach for target separation.
Waterproof Options: If you plan to detect in shallow water, ensure your detector or coil is waterproof. The standard Bounty Hunter 1500 coil is not waterproof.
Always be aware of tide times and local regulations for beach detecting.
Detecting Techniques for the Bounty Hunter 1500
Beyond understanding the controls and choosing a location, specific techniques can significantly improve your results with the Bounty Hunter 1500. These methods help you extract the most information from every signal.
The Sweep Pattern: Covering Ground Effectively
A consistent and overlapping sweep pattern is crucial. Move the coil slowly and steadily from side to side, ensuring each sweep overlaps the previous one by about half the coil’s width.
Slow and Steady: Avoid rushing your sweeps; this allows the detector to process the signal properly.
Consistent Height: Try to keep the coil parallel to the ground at a consistent height.
This methodical approach ensures you don’t miss potential targets.
Pinpointing Targets Accurately
Once you get a good signal, pinpointing the exact location of the target before digging is vital.
1. Sweep in an X Pattern: Sweep the coil over the target area from north to south, then east to west. Note the center point where the signal is strongest.
2. Use the Pinpointer: Once you’ve dug your plug, use your pinpointer to quickly locate the target within the soil.
Accurate pinpointing saves time and effort during recovery.
Dealing with Difficult Signals
Sometimes, the Bounty Hunter 1500 might give a faint or inconsistent signal. This could be a deep target, a small target, or a target on the edge of being discriminated out.
Re-sweep: Try sweeping from different directions.
Lower Sensitivity: Slightly lower sensitivity can sometimes stabilize a chattering signal.
Dig It: If the signal is repeatable and not a clear iron tone, it’s often worth investigating. Many overlooked finds come from signals that aren’t perfectly clear.
Learning to interpret these borderline signals is a skill that develops with experience.
Maintaining Your Bounty Hunter 1500 for Longevity
Proper care and maintenance will ensure your Bounty Hunter 1500 metal detector performs reliably for years to come. Keeping it in good condition is simple but often overlooked.
Cleaning Your Detector
After each detecting session, especially if you’ve been in mud or sand, clean your detector.
Control Box: Wipe down with a damp cloth. Avoid submerging it in water unless specified as waterproof.
Search Coil: Clean off all dirt and debris. A soft brush can be helpful.
Shaft: Wipe down the shaft sections.
Keeping the detector clean prevents dirt from interfering with its operation and protects the finish.
Battery Care
The Bounty Hunter 1500 uses 9-volt batteries. Always use fresh, good-quality batteries.
Storage: If you plan to store the detector for an extended period, remove the batteries to prevent corrosion.
Low Battery Indicator: Pay attention to any indicators that suggest the batteries are low, as this can affect performance.
Fresh batteries ensure consistent power and optimal detection depth.
Coil Care
The search coil is the most vulnerable part of your detector.
Avoid Impact: Try not to bang the coil against rocks or hard surfaces.
Storage: Store the detector with the coil protected.
A damaged coil can lead to erratic signals or a complete loss of detection capability.
Common Issues and Troubleshooting with the Bounty Hunter 1500
Even with a great detector like the Bounty Hunter 1500, you might encounter a few common issues. Knowing how to troubleshoot them can save you a lot of hassle in the field.
Erratic Chattering or False Signals
This is often caused by high sensitivity settings, electrical interference, or highly mineralized soil.
Solution: Lower the sensitivity setting gradually until the signals stabilize. Move away from potential sources of electrical interference (power lines, cell towers). Try a different location if mineralization is suspected.
Not Detecting Anything
If you’re in a known productive area and not getting any signals, several factors could be at play.
Check Batteries: Ensure they are fresh and correctly installed.
Sensitivity: Is the sensitivity set too low?
Discrimination: Is the discrimination set too high, excluding the targets you’re looking for?
Coil: Is the coil properly connected and undamaged?
Weak or Inconsistent Signals
This can indicate a very deep target, a small target, or a target on the edge of the detector’s capabilities.
* Solution: Try sweeping from different angles. If the signal is repeatable and not a trash tone, it’s worth investigating. Consider a larger coil for greater depth if this is a frequent issue.
Troubleshooting is part of the learning process. Don’t get discouraged; most issues have simple solutions.
Bounty Hunter 1500 Metal Detector: FAQ
Here are some common questions beginners have about the Bounty Hunter 1500.
Is the Bounty Hunter 1500 good for beginners?
Yes, the Bounty Hunter 1500 is an excellent choice for beginners. It is user-friendly with straightforward controls, making it easy to learn and operate effectively.
Can the Bounty Hunter 1500 find gold?
While the Bounty Hunter 1500 is primarily designed for coins and relics, it can detect gold jewelry if the gold is of sufficient size and conductivity. It is not specialized for gold prospecting, which often requires different detectors and coils.
Is the search coil on the Bounty Hunter 1500 waterproof?
No, the standard search coil on the Bounty Hunter 1500 is not waterproof. You can detect in damp grass or light rain, but submerging the coil or control box in water will damage the detector.
How deep can the Bounty Hunter 1500 detect?
The detection depth varies depending on the target size, type, and soil conditions. For a coin-sized target in good soil, it can typically detect up to 6-8 inches deep. Larger objects can be detected deeper.
What kind of targets can I expect to find with the Bounty Hunter 1500?
You can expect to find common targets like coins (pennies, nickels, dimes, quarters), pull tabs, foil, jewelry (rings, bracelets), and various small relics.
Do I need special permission to metal detect in most places?
In many public areas like parks, you may need to check local regulations, as some have restrictions. For private property, always obtain explicit permission from the landowner before detecting.
How often should I clean my Bounty Hunter 1500?
It’s best to give your Bounty Hunter 1500 a quick clean after every detecting session, especially wiping down the coil and control box. A more thorough cleaning can be done periodically.
Conclusion: Your Treasure Hunting Journey with the Bounty Hunter 1500
The Bounty Hunter 1500 metal detector is a solid, reliable companion for anyone looking to embark on the exciting journey of treasure hunting. It offers a user-friendly experience that allows you to focus on the thrill of discovery rather than complex settings. By understanding its features, mastering basic techniques, and pairing it with a few essential accessories like a pinpointer and good digging tools, you’ll significantly increase your chances of finding valuable targets. Remember that practice is key; the more you use your Bounty Hunter 1500, the better you’ll become at interpreting its signals and locating hidden treasures. Happy hunting!
