


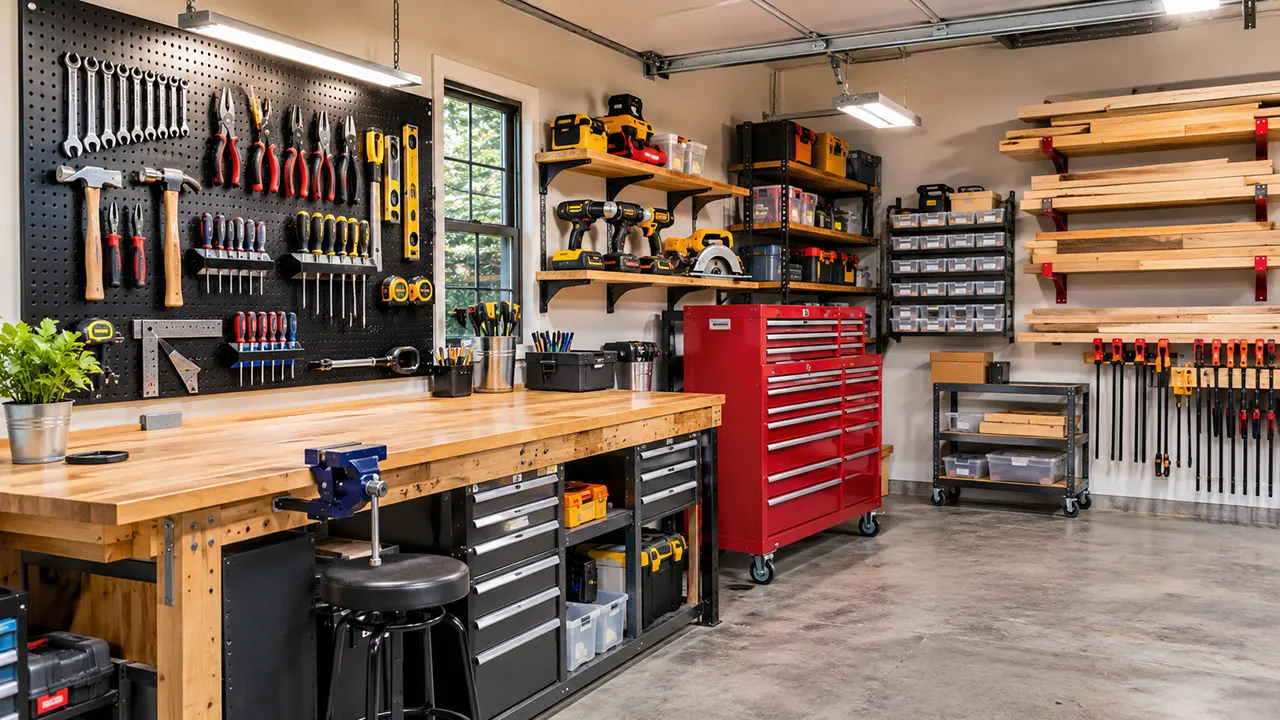
Workshop organization ideas can help you turn a cluttered garage or crowded workroom into a productive workspace. Start by sorting your tools, creating dedicated work zones, and using vertical storage. Then add suitable pegboards, tool cabinets, labeled bins, shelving, and mobile storage to keep everything accessible.
Turn Your Workshop Into a More Organized, Productive Space
A crowded workbench, misplaced screwdriver, tangled power cords, and piles of unused materials can make even a simple DIY project frustrating. The problem is not always a lack of space. Often, the workshop simply lacks a practical storage system.
Good workshop organization starts with understanding how you use your tools. A woodworking shop needs accessible lumber, clamps, saws, and measuring equipment. An automotive workshop needs organized sockets, wrenches, diagnostic tools, and spare parts.
This guide covers practical workshop organization ideas for large garages, small home workshops, woodworking spaces, and mechanic shops. You will also find storage products worth considering, budget-friendly solutions, and safety tips to help keep your workspace functional.
Affiliate disclosure: This article may contain affiliate links. If you purchase through qualifying links, ToolGuider may earn a commission at no additional cost to you.
1. Start With a Workshop Organization Plan
Before buying storage products, take a close look at your existing workshop. Buying cabinets and organizers without a plan can waste money and consume valuable floor space.
Declutter and Sort Your Tools
Start by removing everything from your workbench and sorting your tools into groups.
A practical sorting system includes:
- Hand tools: Hammers, screwdrivers, pliers, wrenches, and measuring tools.
- Power tools: Drills, grinders, circular saws, sanders, and impact drivers.
- Accessories: Drill bits, saw blades, sanding discs, and batteries.
- Hardware: Screws, nails, bolts, nuts, washers, and connectors.
- Materials: Lumber, pipes, clamps, adhesives, and project supplies.
Remove broken tools, duplicate items you no longer need, and materials that have no realistic future use. Keep tools you use occasionally in secondary storage instead of allowing them to occupy your main work area.
Measure Your Available Workshop Space
Measure the walls, floor, ceiling height, doors, windows, and workbench area. Also check where electrical outlets, lighting, and other fixed equipment are located.
Create a simple floor plan before installing permanent storage.
Remember to account for the space required to open cabinet doors, pull out drawers, move rolling carts, and handle long materials.
Identify Your Main Work Zones
Divide the workshop into functional areas according to your projects.
| Workshop zone | Main purpose | Typical equipment |
|---|---|---|
| Tool storage | Keep tools organized | Cabinets, pegboards |
| Workbench | General repairs and assembly | Bench, hand tools |
| Cutting area | Cut and prepare materials | Saws, measuring tools |
| Material storage | Store project supplies | Lumber racks, shelves |
| Small-parts area | Organize hardware | Bins, drawers |
| Finishing area | Painting and surface preparation | Finishing supplies |
The important principle is to organize around the movement of materials. Tools and supplies should be close to the tasks that require them.
2. Make Better Use of Workshop Wall Space
Walls are among the most useful areas in a crowded workshop. Instead of allowing tools to occupy every drawer and workbench surface, use vertical storage to keep frequently used equipment visible and accessible.
Install a Pegboard Tool Organization System
A pegboard is one of the simplest workshop storage solutions. It allows you to hang hand tools, accessories, and lightweight equipment without using additional floor space.
You can organize tools by category:
- Screwdrivers and pliers in one section.
- Hammers and measuring tools in another.
- Wrenches and adjustable spanners together.
- Frequently used accessories near the workbench.
Traditional hardboard pegboards are inexpensive, while metal pegboards offer another option for users who want a more durable panel.
Recommended product: Wall Control Metal Pegboard Tool Storage Kit
Wall Control offers steel pegboard panels with compatible hooks, brackets, shelves, and other accessories. Its panels use 20-gauge steel and a powder-coated finish. A 32-by-48-inch standard tool storage kit was listed at $120.04 at Home Depot when checked on November 2, 2026.
Best for: Homeowners who want a configurable wall-mounted tool storage system.
Consideration: Check the panel dimensions, compatible accessories, mounting requirements, and total cost before ordering. The exact kit configuration matters.
Build a French Cleat Tool Wall
A French cleat system uses matching angled wooden strips to hold removable tool holders against a wall. You can build custom holders for drills, clamps, squares, measuring equipment, and other workshop accessories.
The main advantage is flexibility. You can move holders when your tool collection changes without rebuilding the entire wall.
This is especially useful for woodworking enthusiasts who enjoy building their own storage solutions.
Use Slatwall Panels and Wall-Mounted Tool Racks
Slatwall panels provide horizontal channels that accept compatible hooks, baskets, and shelves.
They work well when you need to organize different types of equipment on the same wall.
Before purchasing, check the accessory compatibility and load rating. Not every hook or basket works with every slatwall system.
Add Magnetic Tool Holder Strips
Magnetic tool holders provide quick access to compatible metal tools. They are particularly useful for organizing wrenches, screwdrivers, and other steel hand tools.
You can install them above a workbench or beside a tool cabinet.
For a more detailed buying guide, see our article on magnetic tool holder strips.
Do not assume every metal tool is suitable for magnetic storage. Check its material, weight, and the holder’s specified capacity.
3. Organize Hand Tools and Power Tools Separately
Hand tools and power tools have different storage requirements. Combining everything in one cabinet can make tools harder to find and increase unnecessary movement around the workshop.
Create Dedicated Hand Tool Storage
Keep frequently used hand tools close to the workbench.
Use drawer dividers, labeled holders, pegboard hooks, or custom tool racks to give each tool a designated location.
For example, a mechanic can keep socket sets, ratchets, and combination wrenches together. A woodworker can organize chisels, measuring tools, hand planes, and marking equipment in separate sections.
Build a Power Tool Storage Station
Power tools usually require more space than hand tools. Store them on sturdy shelves, in cabinets, or on dedicated wall-mounted racks.
Consider the following arrangement:
- Drills and impact drivers together.
- Sanders and grinders in another section.
- Circular saws and larger equipment on suitable shelves.
- Accessories close to their compatible tools.
Keep heavy equipment on properly supported shelves or low storage surfaces rather than placing it on lightweight hooks.
Organize Cordless Tool Batteries and Chargers
A dedicated charging station can prevent batteries and chargers from spreading across your workbench.
Use a stable shelf with suitable electrical access. Keep batteries away from excessive heat, moisture, and materials that can easily catch fire. Follow the battery and charger manufacturers’ instructions for charging, inspection, and storage.
OSHA identifies lithium-ion batteries as a potential workplace safety concern and provides guidance on their hazards and controls.
Keep Tool Accessories and Attachments Together
Drill bits, saw blades, sanding discs, and other accessories are easy to misplace.
Use labeled cases or divided organizers. Assign each accessory a specific location near its compatible power tool.
This simple arrangement reduces the time spent searching for attachments during a project.
4. Maximize Workbench Organization
Your workbench is the center of many workshop activities. If it becomes a permanent storage area, you lose the surface needed for actual projects.
Add Drawer Organizers and Tool Trays
Use drawer dividers to separate small hand tools, measuring equipment, and accessories.
A divided drawer is often more practical than a large open drawer where everything becomes mixed together.
Install Workbench Shelves
Use shelves below or above the workbench for supplies you need regularly.
Store frequently used items within easy reach. Keep heavier equipment on properly supported lower shelves.
Create a Dedicated Workbench Tool Zone
Keep a small selection of essential tools near the work surface:
- Measuring tape.
- Pencil and marker.
- Utility knife.
- Combination square.
- Frequently used screwdrivers.
- Safety glasses.
Avoid turning this area into long-term storage for tools that you rarely use.
Keep the Work Surface Clear for Active Projects
Use a simple rule: the workbench should primarily support the current project.
When you finish a task, return unused tools to their assigned locations. This makes it easier to start the next project without first clearing a pile of equipment.
5. Find the Right Storage for Small Workshop Parts
Small hardware can create surprisingly large organization problems. Screws, nuts, washers, nails, and bolts often end up mixed together in boxes or drawers.
Use Labeled Bins for Screws, Nuts and Bolts
Choose small storage bins with clear labels. Separate hardware by type, diameter, length, and other useful characteristics.
For example, create different containers for wood screws, machine screws, hex bolts, nuts, and washers.
Install a Wall-Mounted Parts Organizer
Wall-mounted bins keep small parts visible and accessible without occupying the workbench.
Recommended product: Akro-Mils AkroBins
Akro-Mils makes industrial plastic storage bins that can be stacked or hung on compatible louvered panels, rails, and racks. Some models also support dividers for separating different parts. Akro-Mils+2
Best for: Workshops with large collections of fasteners, hardware, and small components.
Consideration: The bins and mounting systems may be sold separately. Check the model dimensions and compatibility before purchasing. Current pricing for a specific AkroBins configuration was not verified.
Sort Drill Bits, Blades and Accessories
Use dedicated cases or divided containers for drill bits, saw blades, and sanding accessories.
Keep sizes and types clearly marked. This makes it easier to identify the right accessory without opening multiple containers.
6. Use Workshop Cabinets, Tool Chests and Rolling Carts
Cabinets and tool chests are useful when you own many tools or want to protect equipment from dust.
Organize Tools in a Rolling Tool Chest
A rolling tool chest provides multiple drawers for organizing hand tools, sockets, measuring equipment, and accessories.
Recommended product: Husky 36-inch 12-Drawer Combination Tool Chest and Cabinet
The Husky H36CH6TR6LER model has 12 drawers, full-extension ball-bearing slides, drawer liners, a power strip with USB ports, and a total advertised storage capacity of 21,704 cubic inches. Home Depot listed it at $498 when checked on November 2, 2026. The Home Depot
Best for: Mechanics, DIY enthusiasts, and people with larger hand tool collections.
Consideration: The cabinet measures 36 inches wide and 63.5 inches high. Its listed weight is approximately 245 pounds, so plan its location before delivery. It is not a space-saving choice for every small workshop.
For additional options, see our guide to best tool chests for a home shop.
Install Workshop Storage Cabinets
Use cabinets for equipment that does not need to remain visible.
They are particularly useful for protecting accessories, consumables, and supplies from dust.
Choose cabinet dimensions according to your available wall and floor space. Check the shelf capacity and mounting instructions before storing heavy equipment.
Use Mobile Tool Carts for Flexible Work Areas
A mobile cart can move tools and supplies between different work areas.
It works well when several projects share one workshop or when a fixed tool cabinet is too far from the active workbench.
Choose locking casters and a stable design. Do not overload the cart or use it as a substitute for a properly anchored storage cabinet.
7. Create More Space in a Small Workshop
A small workshop requires a different approach. Instead of trying to fit every storage product into the room, prioritize the systems that provide the most useful storage without blocking movement.
Use Vertical Storage Instead of Expanding the Floor Footprint
Install wall-mounted organizers, cabinets, and shelves where suitable.
Keep frequently used tools at accessible heights. Reserve less convenient storage locations for items you rarely need.
Install Overhead Storage for Suitable Items
Overhead storage can free up floor and wall space in garages with suitable ceiling structures.
Recommended product: FLEXIMOUNTS GR46B-E Adjustable Height Overhead Garage Storage Rack
This ceiling-mounted rack measures 72 by 48 inches and has an advertised 450-pound capacity. Its installation height can be adjusted, making it useful for storing bulky, infrequently used supplies. Home Depot listed the GR46B-E at $179.99 when checked on November 2, 2026. The Home Depot+1
Best for: Garages with suitable ceiling structures and enough clearance for overhead storage.
Important: Follow the manufacturer’s installation instructions. The ceiling brackets must be secured to appropriate structural supports, not drywall alone. Check garage door clearance, vehicle clearance, and the total load before installation.
Do not use overhead racks for items you need to access frequently.
Use Foldable and Mobile Workstations
A folding workbench can provide additional working space when needed without permanently occupying the floor.
Mobile carts also allow you to move equipment between work zones.
Organize a One-Car Garage Workshop
A one-car garage can accommodate a functional workshop if you plan the layout carefully.
Use one main workbench against a suitable wall, wall-mounted tool storage, and compact cabinets. Keep the central area open for projects that require additional space.
Make a Compact Basement Workshop More Functional
Basement workshops often have limited ceiling height and fewer natural ventilation options.
Use shallow wall storage, compact workbenches, and appropriate lighting. Plan dust collection and ventilation according to the equipment and materials you use.
8. Organize Lumber, Clamps and Workshop Materials
Woodworking workshops need more than tool storage. Lumber, clamps, pipes, and leftover materials can quickly occupy valuable floor space.
Install a Wall-Mounted Lumber Rack
Recommended product: BORA PBR-001 Six-Level Lumber Storage Rack
The BORA six-level lumber rack is designed for organizing long materials such as boards, pipes, and molding.
The manufacturer’s specifications for the six-tier rack list a capacity of 110 pounds per level and 660 pounds overall. Its dimensions are approximately 39.5 inches high, up to 72 inches wide, and 12.5 inches deep.
Acme Tools listed the PBR-001 at $51.65 when checked during research. Confirm the exact model and configuration before ordering because manufacturer and retailer model suffixes can differ.
Best for: Woodworkers and DIY enthusiasts who need organized storage for long materials.
Consideration: Mount the rack securely according to the manufacturer’s instructions. Distribute the load properly and avoid placing unstable or damaged boards on the rack.
Build a Dedicated Clamp Storage Rack
Clamps are awkward to store in ordinary drawers. A wall-mounted rack can keep them organized and easy to access.
Arrange clamps by type and size. Keep heavier clamps on a suitably supported lower section.
Organize Scrap Wood and Offcuts
Do not allow leftover wood to accumulate randomly.
Separate reusable pieces by length and thickness. Store useful offcuts in a designated rack or cart, and remove pieces that are no longer suitable for future projects.
Store Pipes, Boards and Long Materials Safely
Use racks designed for the type and weight of material you store.
Long materials should be supported along their length to reduce the risk of tipping, bending, or falling.
9. Compare Workshop Storage Systems: Which One Should You Choose?
Different workshop storage systems solve different problems. The best choice depends on your tools, available space, budget, and how frequently you access your equipment.
| Storage system | Best suited for | Main advantage | Main limitation |
|---|---|---|---|
| Pegboard | Hand tools | Easy visibility | Requires compatible hooks |
| Metal pegboard | Heavier-duty tool organization | Durable panels | Higher initial cost |
| French cleat | Custom tool holders | Highly flexible | Requires DIY installation |
| Slatwall | Mixed workshop equipment | Configurable accessories | Accessory compatibility |
| Tool chest | Mechanics’ tools | Organized drawers | Uses floor space |
| Storage cabinets | Accessories and supplies | Enclosed storage | Less visible contents |
| Shelving | Bins and materials | Versatile storage | Requires suitable support |
| Overhead racks | Bulky supplies | Frees floor space | Requires structural mounting |
Pegboard vs. French Cleat vs. Slatwall
Choose pegboard when you want simple, visible tool organization. French cleats are better when you want to build custom holders that can be moved as your needs change. Slatwall is useful when you prefer a modular commercial system with compatible accessories.
There is no universal winner. A workshop may benefit from combining two or more systems.
When Should You Buy a Tool Chest Instead of Wall Storage?
A tool chest is useful for organizing many hand tools and protecting them inside drawers. Wall storage is generally more convenient for frequently used tools that you want to see and reach quickly.
If your workshop has limited floor space, begin with wall storage and add a compact tool chest only when you need more enclosed storage.
10. Workshop Safety and Storage Mistakes to Avoid
An organized workshop should make work safer as well as easier.
Avoid Overloading Shelves and Wall Organizers
Check the manufacturer’s weight capacity and installation requirements. Distribute heavy items properly rather than concentrating the entire load in one area.
OSHA’s construction storage standard requires materials stored in tiers to be secured against sliding, falling, or collapse. Its industrial material-handling standard also addresses stable storage and clear aisles. These requirements apply to their respective regulated workplaces, but the underlying safety principles are useful when planning a home workshop.
Keep Walkways and Emergency Access Clear
Do not store tools, lumber, extension cords, or equipment where they obstruct exits or walking paths.
Keep access to electrical panels and other essential equipment unobstructed.
Store Heavy Items at Suitable Heights
Place heavy tools and materials on stable lower shelves whenever practical. This reduces the difficulty of lifting and handling heavy objects.
Follow Manufacturer Guidance for Battery Charging
Use compatible chargers and inspect batteries for visible damage. Keep charging equipment away from combustible clutter and follow manufacturer guidance on charging locations and conditions.
Avoid Buying Storage Products Before Measuring
One of the most common workshop organization mistakes is purchasing storage equipment before checking the available space.
Measure the installation area, confirm compatibility, and consider the complete system cost before buying.
11. Maintain an Organized Workshop With a Simple Routine
Organizing a workshop is not a one-time project. Tools and materials change as you complete new projects, buy equipment, and develop different working habits.
Return Tools to Their Assigned Locations
Put tools back after each project. Avoid leaving frequently used equipment on the workbench permanently.
Label New Storage Areas
Use clear labels on cabinets, bins, and drawers. This is particularly helpful when multiple people share the same workshop.
Perform a Weekly Workshop Reset
Spend a few minutes checking the workbench, floor, and tool storage areas.
Remove waste, return unused tools, and identify supplies that need restocking.
Review Your Storage System as Your Tool Collection Grows
Your original storage plan may not suit your workshop forever.
When you purchase new equipment, check whether existing storage can accommodate it. If not, reorganize the relevant area before adding another cabinet or rack.
Frequently Asked Questions About Workshop Organization
1. What is the best way to organize a workshop?
The best approach is to organize tools according to their purpose and frequency of use. Start by sorting equipment, creating dedicated work zones, and choosing suitable storage for each tool category. Keep frequently used tools close to the workbench and move bulky or rarely used supplies into secondary storage.
2. How do you organize a small workshop with limited space?
Use vertical wall storage, compact cabinets, and mobile workstations. Install pegboards or French cleats for hand tools, use divided bins for small parts, and consider overhead storage where the ceiling structure allows it. Keep the center of the workshop open for active projects.
3. What is the best storage system for workshop tools?
There is no single best system for every workshop. Pegboards work well for visible hand tool storage, tool chests organize equipment in drawers, and French cleats provide flexible custom storage. A combination of these systems often works better than relying on one solution.
4. Is pegboard or slatwall better for workshop organization?
Pegboard is generally a straightforward choice for hanging hand tools and lightweight accessories. Slatwall offers modular channels that accept compatible hooks, shelves, and baskets. Your decision should depend on the tools you own, accessory availability, installation requirements, and budget.
5. How do you organize power tools in a garage workshop?
Group power tools by type and store them on suitable shelves, in cabinets, or on dedicated racks. Keep accessories near compatible tools and create a separate area for batteries and chargers. Make sure storage surfaces can support the weight of the equipment.
6. How can I organize a workshop on a budget?
Start with decluttering and rearranging existing storage. Build simple wooden shelves, make DIY French cleat holders, reuse suitable containers, and label storage bins. Buy commercial storage products only when they solve a specific problem that existing solutions cannot handle effectively.
7. What should be stored on workshop walls?
Frequently used hand tools, lightweight accessories, measuring equipment, and suitable small-parts organizers are good candidates for wall storage. Use properly mounted systems with compatible accessories and verified load limits. Keep heavy equipment on appropriately supported storage instead of unsuitable hooks.
8. How do you organize screws, nuts and bolts in a workshop?
Separate fasteners by type, size, and length. Store them in labeled plastic bins, divided drawers, or wall-mounted parts organizers. Clear containers can make identification easier, while dividers help prevent different hardware sizes from becoming mixed together.
Build a Workshop That Works for Your Projects
A well-organized workshop does not require expensive cabinets or a complete renovation. Start with a clear layout, remove unnecessary clutter, and choose storage systems that match the tools you actually use.
If your workbench is crowded, begin with wall storage. If small hardware keeps getting mixed together, introduce labeled bins. If lumber occupies your floor, consider a suitable wall-mounted rack.
Make one improvement at a time. The goal is not to fill your workshop with storage products. It is to create a workspace where every tool has a suitable place and every project has room to move forward.
Start with your most cluttered work zone and organize it first.
