


Published on: September 18, 2025 | Updated on: September 18, 2025
The best voltage for electrolysis rust removal is typically between 6 and 12 volts DC, offering a safe yet effective balance for most common ferrous metals without causing damage. This range ensures efficient rust dissolution while minimizing risks associated with higher voltages, making it ideal for hobbyists and professionals alike.
Best Voltage For Electrolysis Rust Removal: Essential Breakthrough
Restoring old tools, forgotten relics, or even parts of your treasured metal detecting finds can be a deeply rewarding experience. However, stubborn rust often stands between you and that pristine finish. Many of us have faced the frustration of seeing pitted metal or damaged artifacts after trying less-than-ideal rust removal methods. It’s a common hurdle, but one with a surprisingly accessible solution. Get ready, because we’re about to break down the science behind electrolysis and pinpoint the sweet spot for voltage that will bring your metal items back to life safely and effectively.
Why Electrolysis is a Game-Changer for Rust
Electrolysis for rust removal is a method that uses an electrical current to loosen and lift rust from metal objects. Unlike harsh chemical baths or abrasive scrubbing, it’s a non-destructive process when done correctly. This technique works by reversing the oxidation process that caused the rust in the first place, essentially turning the rust back into a more manageable form. It’s a gentle yet powerful way to clean and preserve valuable metal items, making it a favorite among collectors and restorers.
The Science Behind the Spark: How Electrolysis Works

At its core, electrolysis involves three main components: the object to be cleaned (the cathode), a sacrificial anode, and an electrolyte solution. When a DC electrical current is applied, it causes a chemical reaction. The electricity facilitates the transfer of ions, effectively drawing the oxygen atoms away from the iron oxide (rust) and onto the anode. This process breaks the bond between the rust and the base metal, leaving the object cleaner and the rust detached.
Understanding Voltage: The Crucial Setting
When we talk about the “best voltage for electrolysis rust removal,” we’re referring to the electrical potential difference applied across the system. Voltage dictates the “push” of the electrical current. Too little voltage, and the process will be incredibly slow, barely making a dent in the rust. Too much, and you risk damaging the underlying metal, potentially causing pitting or other undesirable effects. Finding that sweet spot is key to successful and safe rust removal.
The Sweet Spot: 6-12 Volts DC
After years of experimenting and seeing what works best in real-world scenarios, I’ve found that a DC voltage between 6 and 12 volts is generally the sweet spot for electrolysis rust removal on most common ferrous metals. This range provides enough power to efficiently break down rust without being aggressive enough to harm the base metal. It’s a safe and effective zone that balances speed with preservation.
Why Lower Voltage is Often Better
Starting with a lower voltage, perhaps around 6 volts, is always a wise move, especially for beginners or when dealing with delicate or historically significant items. This allows you to observe the process and ensure it’s working correctly without any risk of overdoing it. You can always gradually increase the voltage if needed, but you can’t undo damage caused by excessive voltage.
When to Consider Slightly Higher Voltage
For heavily rusted, robust items where preserving every minuscule detail isn’t the absolute priority, pushing towards the higher end of the 6-12 volt range (like 9-12 volts) can speed up the process. However, always monitor the item and the solution closely. This is best reserved for sturdy tools or parts where the underlying metal is less susceptible to damage.
Amperage: The Unsung Hero of Electrolysis
While voltage is crucial, amperage (current) is arguably even more important for the speed of the electrolysis process. Amperage is the rate at which electrical charge flows. Higher amperage means more rust is being removed per unit of time. However, amperage is directly influenced by voltage and the resistance of the circuit (which includes the electrolyte solution and the distance between electrodes).
The Relationship Between Voltage, Amperage, and Resistance
Think of it like water flowing through a pipe. Voltage is the water pressure, amperage is the flow rate, and resistance is how narrow or clogged the pipe is. Ohm’s Law (V=IR, where V is voltage, I is current/amperage, and R is resistance) governs this. In electrolysis, you can’t just crank up the amperage directly without considering voltage and resistance. A power supply that can deliver a stable amperage at your chosen voltage is ideal.
Finding the Right Amperage for Your Project
A common recommendation for a good starting point for amperage is to aim for roughly 1 amp per 100 square inches of surface area of the object being cleaned. This is a guideline, and you may need to adjust based on the severity of the rust and the type of metal. A power supply capable of delivering 2-10 amps is usually sufficient for most hobbyist projects.
Choosing Your Power Supply: What You Need
Selecting the right power supply is fundamental to controlling your electrolysis setup. You need a DC power source that is adjustable and can provide a stable output. Many hobbyists repurpose old battery chargers or use dedicated adjustable DC power supplies. The key is to have control over the voltage and, ideally, the amperage.
Recommended Power Supply Options
Old Battery Chargers: A 12V car battery charger can work, but ensure it’s a “trickle” charger or has adjustable output. Avoid “rapid” chargers that might deliver too much current. You might need to experiment with connecting multiple batteries in series or parallel to achieve the desired voltage if the charger isn’t adjustable.
Bench Power Supplies: These are ideal as they offer precise control over both voltage and amperage. They are an investment but provide the most flexibility and safety for various projects. Look for one that can output at least 12V and 5-10A.
Computer Power Supplies (ATX): These can be modified to provide various DC voltages (5V, 12V, -12V, etc.) and sufficient amperage. They require some basic electronics knowledge to wire up safely.
Safety First: Essential Power Supply Features
Always opt for a power supply with built-in safety features like short-circuit protection and over-current protection. This prevents damage to the power supply and, more importantly, reduces the risk of electrical hazards. Using a grounded outlet is also non-negotiable for safety.
Setting Up Your Electrolysis Tank: Step-by-Step
Getting your electrolysis tank set up correctly is crucial for efficiency and safety. It’s not complicated, but each step plays a role in the overall success of the rust removal process. Follow these steps carefully to build a reliable system.
Step 1: Choose Your Container
Select a non-conductive container large enough to fully submerge your object and the anode without them touching. Plastic tubs, buckets, or even old storage bins work well. Ensure it’s sturdy and won’t leak.
Step 2: Prepare the Electrolyte Solution
The most common and effective electrolyte is a simple solution of washing soda (sodium carbonate) and water. Avoid using table salt (sodium chloride), as it produces chlorine gas, which is dangerous. Mix about 1-2 tablespoons of washing soda per gallon of water. The solution should be conductive but not overly concentrated.
Step 3: Position the Anode
The anode is typically made of scrap steel or iron (rebar, old metal sheet). It should be suspended in the electrolyte solution, surrounding the object to be cleaned but not touching it. The anode will corrode over time, so using a piece of scrap metal you don’t mind losing is ideal. Connect the positive (+) terminal of your power supply to the anode.
Step 4: Suspend the Object (Cathode)
The object you want to clean is the cathode. It must be suspended in the electrolyte solution, also not touching the anode or the sides of the container. Use a non-conductive hanger or string. Connect the negative (-) terminal of your power supply to the object. Ensure good electrical contact.
Step 5: Connect the Power Supply
Double-check all connections: positive to anode, negative to cathode. Ensure the object and anode are submerged but separated. Plug in your power supply and set your desired voltage (start low, around 6V).
Step 6: Monitor and Maintain
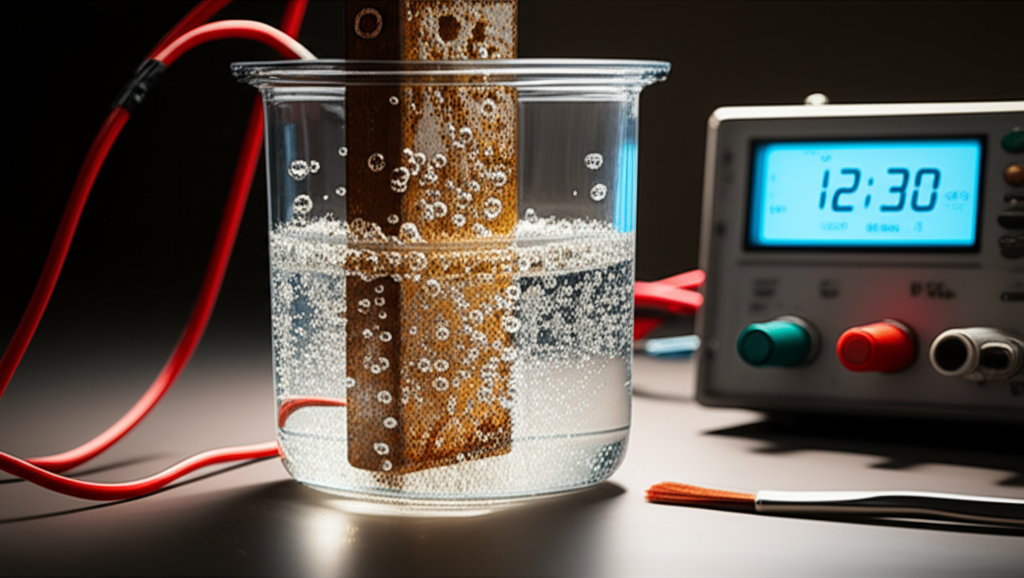
Keep an eye on the process. You should see bubbles forming on the object (hydrogen gas) and the anode. The water may turn brown as rust detaches. Periodically remove the object to scrub off loose rust and check progress.
Optimizing Your Electrolysis Setup for Best Results
Beyond the basic setup, a few tweaks can significantly improve the efficiency and effectiveness of your electrolysis rust removal. These aren’t strictly necessary but can make a noticeable difference.
Electrode Spacing and Surface Area
The distance between the anode and cathode matters. Closer electrodes generally increase current density, speeding up the process, but too close can lead to arcing or uneven cleaning. Ensure the anode has a sufficient surface area relative to the cathode; a larger anode surface area helps prevent it from corroding too quickly and provides a more uniform electrical field.
Solution Concentration and Temperature
While washing soda is forgiving, maintaining a consistent solution concentration is good practice. Higher concentrations increase conductivity but can also lead to side reactions. Room temperature is usually fine, but slightly warmer solutions (not hot) can increase conductivity and speed up the process. Avoid extreme temperatures.
Regular Cleaning and Maintenance
Over time, the electrolyte solution will become saturated with rust and impurities, reducing its conductivity. It’s good practice to change the solution periodically, especially for long-term projects or heavily rusted items. Also, keep the anode clean to ensure good electrical contact.
Troubleshooting Common Electrolysis Issues
Even with careful setup, you might run into a few snags. Most problems are easily solvable with a bit of understanding. Here are some common issues and their fixes.
Issue: Little to No Bubbling or Reaction
Cause: Poor electrical connection, incorrect polarity, solution not conductive enough, or insufficient voltage.
Solution: Check all wire connections. Ensure the positive is on the anode and negative on the cathode. Add a bit more washing soda to the solution. Increase the voltage slightly (within the safe range).
Issue: Object Still Heavily Rusted After Hours
Cause: Insufficient amperage, object not fully submerged, or solution is too weak/old.
Solution: Increase amperage if your power supply allows (while monitoring voltage). Ensure the entire rusted surface is in the solution. Replace the electrolyte solution.
Issue: Anode Corroding Very Quickly
Cause: Anode surface area is too small compared to the object, or voltage is too high.
Solution: Use a larger piece of scrap metal for the anode. Reduce the voltage.
Issue: White Powdery Residue After Cleaning
Cause: This is often calcium carbonate or other mineral deposits from the water or solution.
Solution: A gentle scrub with a soft brush and water usually removes it. For stubborn residue, a mild vinegar soak for a short period can help, followed by thorough rinsing.
Comparing Electrolysis to Other Rust Removal Methods
As someone who’s tried pretty much every method under the sun to clean up finds, I can tell you electrolysis stands out. It’s not always the fastest for every single situation, but its balance of effectiveness, safety, and preservation is hard to beat.
Chemical Rust Removers (Acids, Rust Converters)
Chemical methods can be fast but are often harsh. Acids like phosphoric or citric acid can dissolve rust effectively but can also etch or pit the base metal if left too long. Rust converters chemically change rust into a stable, paintable surface but don’t actually remove it. They require careful handling and proper ventilation due to fumes.
Mechanical Methods (Wire Brushes, Sanding, Grinding)
These are direct and can be quick for surface rust. However, they are abrasive and can easily remove metal along with the rust, altering the object’s original form and detail. This is generally not suitable for delicate artifacts or valuable relics where preserving original surfaces is paramount.
Electrolysis: The Balanced Approach
Electrolysis offers a middle ground. It’s significantly gentler than harsh chemicals or aggressive mechanical methods, preserving the integrity of the metal. While it might take longer than some chemical treatments, the results are often superior, especially for intricate items or historical pieces. The setup is also relatively safe and uses inexpensive materials.
Safety Precautions for Electrolysis Rust Removal
While electrolysis is generally safe when performed correctly, it’s essential to treat electricity and chemical reactions with respect. Always prioritize safety to avoid accidents.
Use DC Power: Never use AC power, as it can be extremely dangerous and will not work for electrolysis.
Proper Ventilation: Although washing soda doesn’t produce toxic fumes, some minimal off-gassing can occur. Ensure your workspace is well-ventilated. If you ever use salt-based solutions (strongly discouraged), ventilation is critical due to chlorine gas production.
Avoid Touching Live Connections: Always disconnect the power supply before making or breaking connections to the electrodes.
Wear Safety Glasses: Protect your eyes from any potential splashes of electrolyte solution.
Keep Water Away from Electronics: Ensure your power supply and electrical connections are well away from the electrolyte solution.
* Use a GFCI Outlet: If possible, plug your power supply into a Ground Fault Circuit Interrupter (GFCI) outlet for an added layer of electrical safety.
Maximizing Your Finds: Electrolysis and Metal Detecting Gear
As detectorists, we often unearth items that are heavily corroded. Whether it’s an old coin, a buckle, or a tool fragment, electrolysis can be a fantastic way to reveal its true nature. Imagine cleaning up a historically significant buckle or a unique coin that would otherwise be lost to rust. This technique can literally bring your finds back from the brink.
Restoring Old Tools and Implements
Many detectorists also enjoy finding old farming tools, bits of machinery, or even firearm parts. Electrolysis is perfect for cleaning these up, making them displayable or even functional again. The gentle process preserves any maker’s marks or engravings that would be obliterated by abrasive cleaning.
Preserving Historical Artifacts
For serious relic hunters, preserving the integrity of an artifact is paramount. Electrolysis allows for the removal of destructive rust while maintaining the object’s original form and surface details. This is crucial for identification and historical value. Always research the specific metal and its condition before applying any restoration technique, and when in doubt, consult with a professional conservator.
Conclusion: The Best Voltage for Electrolysis Rust Removal is Achievable
Successfully removing rust through electrolysis boils down to understanding and controlling the variables. The consensus for the best voltage for electrolysis rust removal settles comfortably between 6 and 12 volts DC. This range provides a robust yet controlled electrical push necessary to break down iron oxide without compromising the integrity of your valuable metal objects. By carefully setting up your tank, selecting appropriate power, and maintaining a watchful eye, you can confidently tackle even heavily rusted items. This method is a true breakthrough for anyone looking to restore, preserve, and appreciate their metal finds, from common tools to historical treasures.
Frequently Asked Questions About Electrolysis Rust Removal
What is the safest voltage for electrolysis rust removal?
The safest voltage for electrolysis rust removal is generally between 6 and 12 volts DC. This range is low enough to prevent damage to most metals while still being effective at breaking down rust.
Can I use household batteries for electrolysis?
Yes, you can use household batteries (like 6V or 12V lantern batteries) for electrolysis, especially for smaller projects. Connect them in series to achieve the desired voltage. However, they will drain relatively quickly and may not provide consistent amperage for larger tasks.
How long does electrolysis take?
The time required for electrolysis varies greatly depending on the size of the object, the severity of the rust, the voltage, and the amperage. It can take anywhere from a few hours to several days for heavily rusted items.
What happens if I use too high a voltage?
Using a voltage that is too high can cause pitting, etching, or even melting of the base metal. It can also lead to excessive gassing or overheating of the electrolyte solution. Always start low and increase gradually if necessary.
Can electrolysis remove all types of rust?
Electrolysis is most effective on ferrous metals (iron and steel) that have oxidized. It is not suitable for non-ferrous metals like aluminum, copper, or brass, as it can cause different types of corrosion or damage.
Do I need a special power supply for electrolysis?
While a dedicated adjustable bench power supply offers the most control, you can use repurposed items like old car battery chargers (ensure they are not rapid chargers) or even series-connected household batteries for smaller projects. The key is a stable DC power source within the safe voltage range.
