


Published on: September 20, 2025 | Updated on: September 20, 2025
Unlock the secrets of your Bounty Hunter metal detector with this essential guide. Learn to navigate its features, optimize settings, and maximize your treasure-hunting success. This manual simplifies operation for beginners and seasoned hunters alike, ensuring you get the most out of your device.
Bounty Hunter Metal Detector Manual: Your Essential Field Guide to Unearthing Treasures
Navigating a new metal detector can feel like deciphering an ancient map, especially when you’re eager to start digging. Many enthusiasts find themselves staring at their Bounty Hunter device, a bit unsure of where to begin. This guide is crafted to demystify your Bounty Hunter metal detector manual, transforming confusion into confidence. We’ll walk through its core functions and provide practical tips, so you can spend less time reading and more time finding. Get ready to explore the ground beneath your feet with newfound expertise.
Understanding Your Bounty Hunter Metal Detector’s Core Components
Before diving into specific settings, it’s crucial to grasp the basic parts of your Bounty Hunter metal detector. These are the building blocks for all your detecting adventures. Knowing these will make following any Bounty Hunter metal detector manual much easier.
Your metal detector typically consists of a control box, a search coil, and a shaft. The control box houses all the electronics and user interface, featuring knobs, buttons, and sometimes a display screen. The search coil, usually round and submerged in water or dragged over land, is what actually detects the metal objects underground. The shaft connects these two, allowing you to adjust the detector to your height for comfortable swinging. Understanding how these pieces fit together is the first step to successful operation.
The Control Box: Your Detector’s Brain
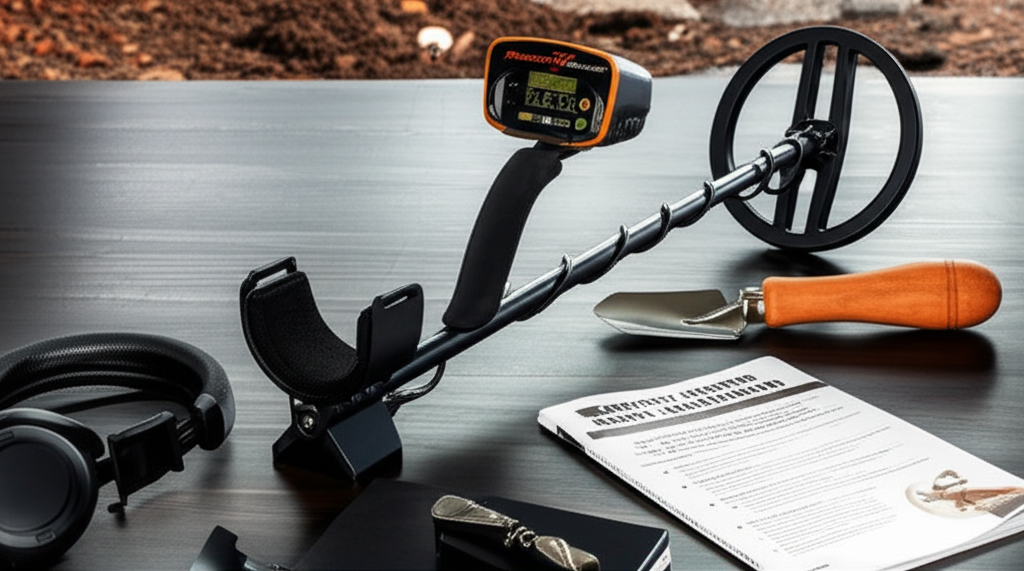
The control box is where the magic happens, translating signals from the coil into understandable information. It’s your command center for tailoring the detector’s performance to specific searching conditions. Familiarizing yourself with its layout is key to mastering your Bounty Hunter metal detector.
Within the control box, you’ll find controls for sensitivity, discrimination, and volume. Sensitivity dictates how deep the detector can sense metal, while discrimination helps you ignore unwanted targets like iron nails. Volume controls the audible feedback you receive, alerting you to potential finds. Many models also feature different modes designed for specific types of searching, such as coins or relics.
The Search Coil: The Eyes of Your Detector
The search coil is the part of your Bounty Hunter metal detector that interacts directly with the ground. Its size and type can significantly impact your detecting results. Choosing the right coil for the job is an often-overlooked aspect of metal detecting.
Standard coils are generally good all-around performers, suitable for most coin and relic hunting scenarios. Smaller coils are excellent for pinpointing targets in trashy areas or navigating tight spaces, while larger coils offer greater depth and wider coverage, ideal for open fields. Different coil shapes and technologies exist, each with its own strengths and weaknesses.
The Shaft and Armrest: Comfort for the Long Haul
Comfort is paramount when you’re out detecting for hours on end. The shaft and armrest are designed to make your experience enjoyable and less fatiguing. Proper adjustment can prevent strain and allow you to cover more ground effectively.
Most shafts are adjustable to accommodate different user heights, ensuring an ergonomic posture. The armrest provides support for your forearm, reducing the load on your arm and shoulder. Some detectors also feature padded grips for added comfort. Taking the time to set up your detector for your body is a small step with big rewards.
Setting Up Your Bounty Hunter Metal Detector for the First Time
Getting your new Bounty Hunter metal detector ready for its maiden voyage is exciting. This section will guide you through the initial setup, ensuring you’re properly equipped to start your treasure hunting journey. We’ll cover assembly and basic configuration, making your Bounty Hunter metal detector manual feel less intimidating.
Assembling your detector usually involves connecting the control box to the shaft and attaching the search coil. Ensure all connections are secure to prevent signal interference or loose parts during use. Once assembled, you’ll need to install batteries, typically found in the control box.
Assembly: Putting It All Together
Putting together your Bounty Hunter metal detector is typically straightforward. Most models use a quick-release system for easy assembly and disassembly. This makes it convenient for transport and storage.
First, slide the sections of the shaft together, adjusting them to your height. Secure the sections with the provided locking mechanisms. Then, attach the search coil to the lower end of the shaft, ensuring the cable is wrapped around the shaft to prevent snagging. Finally, connect the coil cable to the designated port on the control box.
Battery Installation: Powering Your Search
The right power source is essential for consistent performance. Most Bounty Hunter detectors use standard AA or 9-volt batteries. Always check your specific model’s requirements in its manual.
Open the battery compartment on the control box, paying attention to the polarity markings (+ and -). Insert the batteries correctly to avoid damage to the device. A low battery indicator will usually appear on the display when it’s time for a replacement.
Initial Power-On and Basic Calibration
Once assembled and powered on, your detector might require a brief calibration. This process helps the detector adapt to its surroundings. It’s a simple step that ensures optimal performance from the start.
Many Bounty Hunter models have an automatic ground balance feature, which can be initiated by pressing a button while the coil is in the air. Others might have a manual ground balance procedure. Refer to your specific Bounty Hunter metal detector manual for the exact steps for your model.
Mastering the Controls: Sensitivity, Discrimination, and Ground Balance
The heart of effective metal detecting lies in understanding and utilizing your detector’s controls. Sensitivity, discrimination, and ground balance are fundamental to distinguishing valuable targets from junk. Mastering these will significantly improve your finds and reduce frustration.
These settings allow you to fine-tune your Bounty Hunter metal detector to the specific environment you are searching. Without proper adjustment, you might miss good targets or be constantly annoyed by signals from unwanted items. Think of these as your tools for selective searching.
Sensitivity: The Depth Dial
Sensitivity determines how responsive your metal detector is to metallic objects. Higher sensitivity settings can detect deeper targets, but they can also make the detector more susceptible to false signals from electrical interference or mineralized ground. Finding the right balance is key.
If your detector chatters or gives erratic signals, your sensitivity might be too high for the current conditions. Lowering it slightly usually resolves this issue. Conversely, if you suspect there are deeper targets you are missing, try increasing the sensitivity cautiously.
Discrimination: Ignoring the Unwanted
Discrimination is a powerful feature that allows you to ignore certain types of metal, like iron. This is incredibly useful for avoiding the frustration of digging up countless bottle caps and nails. However, setting discrimination too high can cause you to miss valuable targets that might have similar conductivity.
Most Bounty Hunter detectors offer adjustable discrimination levels, often represented by numbers or categories (e.g., Iron, Foil, Ring, Coin). A common practice is to set discrimination just high enough to reject iron but low enough to still detect desirable targets like coins and jewelry. Experimentation is crucial here.
Ground Balance: Adapting to the Earth
Ground balance is the process of adjusting your detector to ignore the signals from minerals in the soil. Different soils have varying mineral content, which can affect a detector’s performance. Proper ground balance ensures you are detecting metal, not the ground itself.
Many modern Bounty Hunter detectors feature automatic ground balance, which continuously adjusts as you swing the coil. For those with manual ground balance, you’ll typically perform this procedure when you first turn on the detector or when moving to a significantly different soil type. Following the steps in your Bounty Hunter metal detector manual is important for accurate results.
Interpreting Signals: Tones, VDI Numbers, and Target ID
Once your Bounty Hunter metal detector is set up, the next challenge is understanding what the signals mean. Your detector communicates potential finds through audible tones and visual displays. Learning to interpret these signals is a skill that develops with practice.
Different tones and numbers correspond to different types of metal and their conductivity. This information helps you decide whether a target is worth digging. A keen ear and a sharp eye will lead to more successful hunts.
Understanding Audio Tones
Audible tones are the primary way most metal detectors alert you to a target. Bounty Hunter detectors often use a multi-tone system. Different tones indicate different types of metal.
Typically, a low-pitched tone might indicate iron or foil, a medium tone could signify pull tabs or gold jewelry, and a high-pitched tone often signals coins or silver. Learning the nuances of your detector’s tones is vital for making quick decisions in the field.
Decoding the Display: VDI and Target ID
Many Bounty Hunter models feature a visual display with a Target ID or VDI (Visual Discrimination Indicator) number. This number provides a more precise indication of the type of metal detected, based on its conductivity. These numbers usually range from 0 to 99.
Understanding the typical VDI ranges for common targets is essential. For instance, coins usually fall within a specific range, while iron is at the lower end. This visual cue, combined with audio tones, offers a powerful tool for target identification. Always consult your Bounty Hunter metal detector manual for the specific VDI ranges of your model.
The Art of the “Chop” and “Sweep”
When a signal is ambiguous, experienced detectorists use techniques like the “chop” or “sweep” to gain more information. The chop involves swinging the coil over the target from different directions. This can help differentiate between a solid target and junk that might be giving a fleeting signal.
The sweep is a slower, more deliberate swing. By listening carefully to how the tone changes as you approach and move away from the target, you can often get a better sense of its size and shape. These techniques, learned through practice, enhance your ability to make informed digging decisions.
Essential Accessories for Your Bounty Hunter Metal Detector
While your Bounty Hunter metal detector is the primary tool, a few accessories can significantly enhance your detecting experience and success rate. These items complement your detector and make the entire process more efficient and enjoyable. Investing in the right gear can make a noticeable difference.
Think of these as your supporting cast, each playing a crucial role in turning a potential find into a recovered treasure. From pinpointing to digging, these accessories streamline your efforts.
The Pinpointer: Finding the Small Stuff
A pinpointer is a small, handheld metal detector that helps you locate targets precisely within the soil plug you dig. It’s an absolute game-changer for quickly finding small items and reducing the time spent digging. Many detectorists consider it an indispensable tool.
Once you’ve located a general area with your main detector, use the pinpointer to narrow down the exact location of the target within the dug soil or hole. This saves immense time and effort, especially in areas with a lot of target “noise.”
Digging Tools: Essential for Recovery
You can’t recover what you can’t dig up! Having the right digging tools is crucial for minimizing disturbance to the environment and safely extracting your finds. The choice of tool often depends on the terrain you’re searching.
A sturdy digging trowel or spade is essential for cutting plugs in grassy areas. For more compact or rocky soil, a robust digging tool with a serrated edge can be more effective. Always aim to make clean plugs that can be easily replaced to leave the area as you found it.
Headphones: Hearing Every Whisper
Using headphones with your metal detector can dramatically improve your ability to hear faint signals. They block out ambient noise, allowing you to focus on the subtle audio cues from your detector. This is particularly helpful in noisy environments.
Many headphones are designed specifically for metal detecting, offering durability and comfort for long periods of use. Look for models with volume control and comfortable earcups. This simple accessory can help you catch targets you might otherwise miss.
Advanced Techniques for Maximizing Your Finds
Once you’ve mastered the basics, it’s time to explore more advanced techniques to elevate your metal detecting game. These methods require a deeper understanding of your detector and the environment. Implementing them can lead to uncovering more significant and unique treasures.
Applying these techniques will help you move beyond common finds and potentially unearth historical artifacts or valuable items. It’s about thinking smarter, not just swinging harder.
Coil Control and Swing Speed
The way you swing your search coil is critical. A consistent, even swing speed is vital for accurate target detection. Too fast, and you risk missing deeper or smaller targets. Too slow, and you might get overloaded signals or miss targets due to overlapping sweeps.
Maintain a consistent height above the ground throughout your swing. Avoid jerky movements; aim for a smooth, rhythmic motion. This ensures the coil covers the ground effectively and provides the detector with a stable signal to analyze.
Understanding Soil Conditions and Mineralization
Different soil types present unique challenges. Highly mineralized ground, for instance, can cause false signals and reduce detector depth. Learning to identify these conditions and adjust your settings accordingly is a mark of an experienced detectorist.
In areas with high mineralization, you might need to lower your sensitivity or adjust the ground balance more carefully. Some detectors have specific modes for dealing with mineralized soil. Observing how your detector reacts to different ground types will build your intuition.
Researching Your Hunting Locations
The best metal detecting spots are often those with a history of human activity. Researching local history, old maps, and even talking to long-time residents can reveal promising locations. This proactive approach can lead you to areas where treasures are more likely to be found.
Look for places where people gathered, traveled, or lived historically – old parks, fairgrounds, riverbeds, or even old building sites. Always ensure you have permission to detect on private property and are aware of local regulations for public lands.
Troubleshooting Common Bounty Hunter Metal Detector Issues
Even the best equipment can sometimes present challenges. Knowing how to troubleshoot common issues with your Bounty Hunter metal detector can save you frustration and keep you out in the field. These are practical solutions to problems you might encounter.
Don’t let a minor glitch halt your treasure hunt. With a little knowledge, most issues can be resolved quickly.
False Signals and Chatter
Erratic signals, often called “chatter,” can be caused by several factors. High sensitivity settings, nearby electrical interference (like power lines), or highly mineralized soil are common culprits. Sometimes, a faulty coil cable connection can also be the source.
Try lowering your sensitivity setting slightly. Move away from potential sources of electrical interference. Ensure the coil cable is securely connected to the control box and check it for any damage. If the problem persists, it might be time to consult the more detailed sections of your Bounty Hunter metal detector manual.
No Signal or Weak Signals
If you’re not getting any signals, or only very weak ones, several things could be wrong. Ensure the batteries are fresh and correctly installed. Check that the search coil is properly connected and undamaged.
It’s also possible that the sensitivity is set too low, or that you are searching over an area with no metal targets. If you suspect there are targets present, try increasing the sensitivity cautiously. If you are searching in an area known for deep targets, you might need a detector with greater depth capabilities or a different coil.
Discrimination Not Working Correctly
If your detector is still signaling on iron when discrimination is engaged, or if it’s ignoring coins, the discrimination setting might be improperly calibrated or set too high. Different metals have varying conductivity, and the detector’s ability to differentiate them is not always perfect.
Experiment with small adjustments to the discrimination knob or setting. Try to identify the tones associated with iron and common targets in your area. Sometimes, a full reset of the detector’s settings to factory defaults, as outlined in your Bounty Hunter metal detector manual, can resolve calibration issues.
Maintaining Your Bounty Hunter Metal Detector for Longevity
Proper maintenance ensures your Bounty Hunter metal detector remains in top working condition for years to come. Taking good care of your gear is essential for consistent performance and longevity. It’s a small investment of time for a significant return.
A well-maintained detector is a reliable detector. Following these simple steps will help protect your investment.
Cleaning After Each Use
After each detecting session, it’s important to clean your metal detector. Remove any dirt, mud, or debris from the control box, shaft, and especially the search coil. Use a damp cloth and mild soap if necessary.
Avoid using harsh chemicals or abrasive cleaners, as they can damage the detector’s finish or electronics. Pay special attention to the coil housing, as accumulated dirt can affect its performance.
Protecting from the Elements
Your metal detector is an electronic device and should be protected from extreme conditions. Avoid leaving it in direct sunlight for extended periods, as this can damage the plastic components and the battery. Similarly, protect it from rain and excessive moisture unless the coil and control box are specifically rated as waterproof.
If your detector is not fully submersible, use a rain cover for the control box, especially if you expect wet weather. Store your detector in a cool, dry place when not in use.
Battery Care
Proper battery care is crucial. If your detector uses rechargeable batteries, follow the manufacturer’s charging instructions. For disposable batteries, remove them if you plan to store the detector for an extended period to prevent leakage.
Always use the type and size of batteries recommended in your Bounty Hunter metal detector manual. Using incorrect batteries can damage the device.
Frequently Asked Questions about Your Bounty Hunter Metal Detector Manual
Here are some common questions beginners have when getting started with their Bounty Hunter metal detector and its manual.
What is the best setting for finding coins?
For coin hunting, you’ll generally want to set your discrimination to ignore iron but be sensitive to coin-like targets. Start with a moderate discrimination level and adjust based on the trash in your area. Always keep sensitivity as high as possible without causing excessive chatter.
Can I use my Bounty Hunter detector in saltwater?
Most standard Bounty Hunter detectors are not designed for use in saltwater, as it can interfere with the signals and potentially damage the electronics. Some specialized models or coils might be salt-water resistant, but always check your specific model’s capabilities.
How deep can a Bounty Hunter metal detector detect?
The detection depth varies greatly depending on the model, coil size, target size, and ground conditions. Entry-level Bounty Hunter detectors typically detect coins up to 6-8 inches deep. More advanced models or larger coils can achieve greater depths.
What does a VDI number mean?
A VDI (Visual Discrimination Indicator) number is a numerical representation of the conductivity of a detected metal target. Higher numbers generally indicate more conductive metals like silver and copper coins, while lower numbers often point to iron or foil.
How often should I ground balance my detector?
If your detector has automatic ground balance, it will adjust itself. For manual ground balance, perform the procedure when you first turn on the detector and anytime you move to an area with significantly different soil mineralization.
Why is my detector making strange noises?
Strange noises, or chatter, are usually caused by high sensitivity settings, electrical interference, or highly mineralized ground. Try lowering the sensitivity or moving to a different location. Ensure the coil cable is securely connected.
Where can I find a digital copy of my Bounty Hunter metal detector manual?
You can typically find a digital copy of your Bounty Hunter metal detector manual on the official Bounty Hunter website. Look for a “Support” or “Manuals” section, where you can usually download a PDF version by entering your model number.
Conclusion: Your Treasure Hunting Adventure Awaits
Mastering your Bounty Hunter metal detector is a journey, and this guide has provided the essential roadmap. By understanding its components, controls, and signals, you are well-equipped to embark on exciting treasure-hunting expeditions. Remember that practice and patience are your greatest allies in this rewarding hobby.
With the knowledge gained from this Bounty Hunter metal detector manual guide, you can confidently head outdoors. Explore new terrains, uncover hidden histories, and experience the thrill of discovery. Happy hunting!
