


Published on: September 20, 2025 | Updated on: September 20, 2025
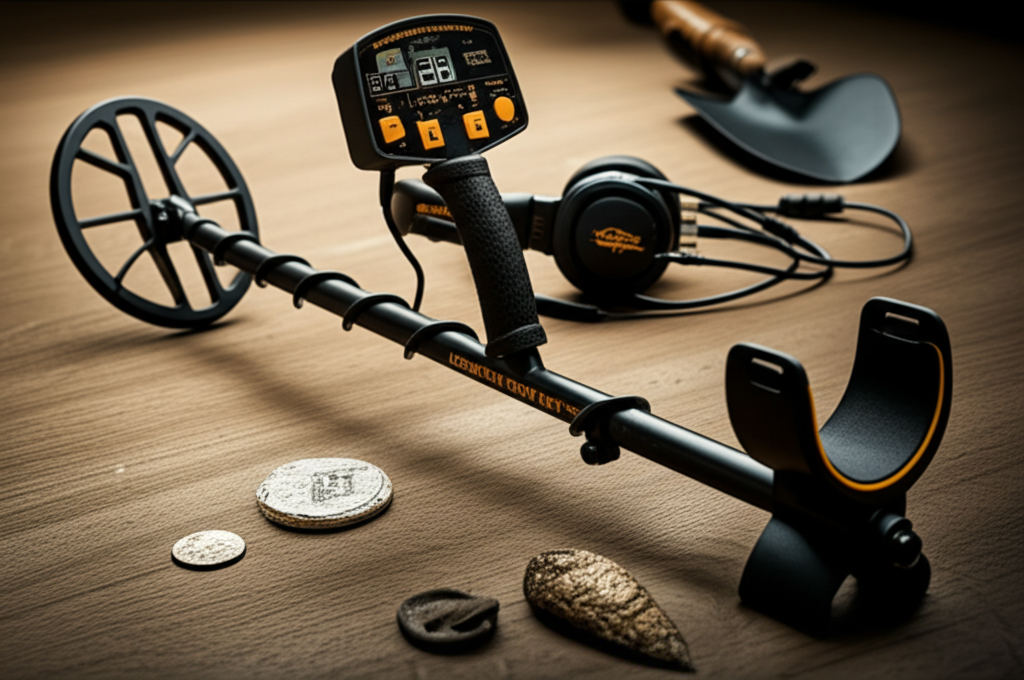
The Bounty Hunter Lone Star Pro metal detector is a user-friendly, affordable option for hobbyists seeking essential finds like coins, relics, and jewelry. This guide explores its features, optimal settings, and tips for maximizing your success in the field.
Ready to unearth some treasures? If you’re eyeing the Bounty Hunter Lone Star Pro metal detector, you’re on the path to some exciting discoveries. Many detectorists start their journey with a reliable, easy-to-use machine, and the Lone Star Pro fits that bill perfectly. It’s designed to make finding those essential items – from old coins to forgotten jewelry – an enjoyable experience. This guide will walk you through everything you need to know to get the most out of this popular detector, ensuring your outings are rewarding.
Why Choose the Bounty Hunter Lone Star Pro?
The Bounty Hunter Lone Star Pro metal detector offers a compelling blend of performance and simplicity, making it a top choice for beginners and seasoned hobbyists alike. It’s engineered for ease of use without sacrificing the ability to locate valuable targets. Its lightweight design and intuitive controls mean you can spend more time detecting and less time fiddling with settings.
Simplicity Meets Performance

This detector is renowned for its straightforward operation. You can essentially turn it on and start searching right away, which is fantastic when you’re eager to get into the field. Despite its simplicity, it packs a punch in terms of target detection capabilities.
Affordability and Value
One of the biggest draws of the Lone Star Pro is its accessible price point. It provides excellent value for money, offering features typically found in more expensive models. This makes it a smart investment for anyone looking to get into metal detecting without breaking the bank.
Built for the Hobbyist
Bounty Hunter has designed this model with the everyday detectorist in mind. It’s robust enough for various terrains and weather conditions, allowing for consistent performance on your treasure hunting adventures.
Key Features of the Bounty Hunter Lone Star Pro
Understanding the core features of the Bounty Hunter Lone Star Pro metal detector is crucial for maximizing your success. These elements work together to help you pinpoint targets efficiently and distinguish between different types of metal.
Adjustable Discrimination and Notch Discrimination
The detector boasts adjustable discrimination, allowing you to ignore unwanted junk like iron nails or pull tabs. The notch discrimination feature lets you fine-tune this further, enabling you to accept or reject specific target categories. This is key to avoiding frustrating false signals and focusing on potential keepers.
Three-Tone Audio ID
Distinguishing targets by sound is a fundamental skill in metal detecting. The Lone Star Pro employs a three-tone audio system, assigning distinct tones to different metal types. This helps you make educated guesses about what lies beneath the coil before you even dig.
Depth Indicator and Target Strength Meter
Knowing how deep a target is can save you a lot of unnecessary digging. The depth indicator provides an estimate, while the target strength meter helps confirm the signal’s solidity. A strong, stable signal often indicates a more substantial or desirable object.
Interchangeable Search Coil
The standard 8-inch concentric coil is versatile, but the ability to swap it out is a significant advantage. Different coils excel in different situations – smaller coils are better for trashy areas, while larger ones offer greater depth. This adaptability enhances the detector’s utility.
Comfortable Ergonomics
A comfortable detector is one you can use for longer periods. The Lone Star Pro features an S-shaped shaft and an adjustable armrest, designed to reduce fatigue during extended detecting sessions.
Getting Started: Your First Steps with the Lone Star Pro
Setting up and using your Bounty Hunter Lone Star Pro metal detector is refreshingly straightforward. Follow these initial steps to ensure you’re ready for your first expedition into the field.
Assembly and Battery Installation
Unpack your detector and assemble the shaft sections. It usually involves a simple click or twist mechanism. Once assembled, open the battery compartment and insert the required batteries (typically AA or 9V, check your manual).
Familiarizing Yourself with Controls
Take a moment to identify each control knob: Power/Volume, Discrimination, and Sensitivity. Understand what each one does before you head out. A quick read of the user manual is highly recommended here for a comprehensive overview.
Basic Operation: Power On and Sweep
Turn the detector on using the Power/Volume knob. Start with the Sensitivity set to medium and Discrimination at a low to moderate level. Hold the coil parallel to the ground, about an inch or two above it, and sweep it in a slow, consistent arc.
Practice in Your Backyard
Before hitting public land, I always recommend practicing in your own yard. Bury a few common targets like a coin, a pull tab, and a small iron object. This allows you to hear the different tones and see how the detector responds without the pressure of a new location.
Optimizing Settings for Essential Finds
Finding those sought-after items with the Bounty Hunter Lone Star Pro metal detector involves more than just sweeping. Adjusting the settings correctly can dramatically improve your success rate.
Sensitivity: Balancing Depth and Stability
Sensitivity controls how deep the detector can ‘see’ into the ground. Higher sensitivity means greater depth, but it can also lead to more false signals, especially in areas with high mineralization or electromagnetic interference. Start with a medium setting and gradually increase it until you hear chattering or instability, then back it off slightly. This provides the best balance between depth and a stable signal.
Discrimination: Targeting What You Want
The discrimination setting is your primary tool for filtering out unwanted junk. For coin and jewelry hunting, I often set the discrimination to reject iron and bottle caps, but accept foil and pull tabs. This is a common starting point, but you’ll need to experiment. Every site is different, and sometimes accepting certain items can lead to unexpected finds.
Notch Discrimination: Precision Filtering
If you find yourself consistently digging foil or pull tabs and want to avoid them, the notch discrimination is your friend. You can set the detector to ignore a specific segment of the discrimination scale. For example, you might notch out the range where pull tabs typically register, while still accepting other desirable targets.
Ground Balance: Adapting to the Earth
While the Lone Star Pro has a fixed ground balance, understanding its importance is key. Ground minerals can affect detector performance. If you’re in an area with highly mineralized soil, you might notice a less stable signal. In such cases, reducing sensitivity slightly can help.
Essential Finds: Coins and Jewelry
The thrill of unearthing old coins or lost jewelry is a major draw for many detectorists. The Bounty Hunter Lone Star Pro metal detector is well-suited for these pursuits.
Targeting High-Traffic Areas
Parks, schoolyards, beaches, and old picnic spots are prime locations for finding lost coins and jewelry. People tend to lose items in areas where they congregate and relax. Always ensure you have permission to detect on private property.
Interpreting Audio and Visual Cues
Coins typically produce a clear, mid-tone audio signal and a strong reading on the target strength meter. Jewelry can vary greatly depending on the metal and size. Gold often gives a lower tone, while silver can be higher. Pay close attention to the tones and target ID numbers (if your model displays them) to differentiate.
Dealing with Trashy Sites
When hunting in areas with a lot of modern trash, like pull tabs and bottle caps, you’ll need to use your discrimination and notch settings carefully. Sometimes, it’s better to dig questionable signals and identify them in the plug than to miss a good target by over-discriminating.
Unearthing Relics and Historical Artifacts
For those fascinated by history, the Bounty Hunter Lone Star Pro metal detector can also be a gateway to finding relics. These finds offer a tangible connection to the past.
Researching Historical Locations
Before you even pick up your detector, research the history of the area you plan to search. Old homesteads, battle sites, ghost towns, and areas of former human activity are excellent places to look for relics. Understanding the history helps you anticipate what you might find.
Adjusting Discrimination for Relics
Relic hunting often requires a different approach to discrimination. You might want to lower discrimination settings to catch older, possibly iron-based artifacts that modern junk filters might reject. This means digging more iron, but the rewards can be significant.
Coil Selection for Relic Hunting
While the stock coil is capable, a smaller coil (like a 6-inch) can be beneficial in overgrown or cluttered relic sites. It offers better maneuverability and can isolate targets more effectively in areas with lots of ferrous debris.
Maximizing Depth and Target Recovery
Getting the most out of your Bounty Hunter Lone Star Pro metal detector involves understanding how to achieve maximum depth and efficiently recover your finds.
Coil Control and Sweep Speed
Sweep the coil slowly and deliberately, overlapping each sweep by about half the coil’s width. A sweep that is too fast will cause you to miss targets, especially deeper ones. Keep the coil as close to the ground as possible without actually scraping it.
Understanding Target Signals
A good target usually produces a consistent, repeatable signal from multiple sweep directions. Faint signals might be deeper targets or small items. Learn to distinguish between a solid signal from a coin and a choppy signal from junk.
Proper Digging Techniques
Once you have a confirmed target, use a good digging tool. For most targets, a small trowel or a digging tool with serrated edges works well. Make a neat plug of turf, carefully lift it, and then sweep your coil over the removed soil to pinpoint the target. Recover the item, then carefully replace the turf to leave the site as you found it.
Troubleshooting Common Issues
Even the best metal detectors can encounter issues. Here’s how to address some common problems you might face with your Bounty Hunter Lone Star Pro.
False Signals and Chattering
If your detector is making erratic noises or chattering, it’s usually due to excessive sensitivity, electromagnetic interference (EMI) from power lines or other devices, or highly mineralized ground. Try lowering the sensitivity, moving away from potential EMI sources, or adjusting your sweep technique.
Difficulty Pinpointing
Sometimes, a target can be elusive. After locating the general area with your sweep, try an “X” pattern with your coil. Move the coil from front to back, then side to side over the target area. This helps narrow down the exact location. Using a pinpointer once you’ve removed the plug is also highly recommended for precise recovery.
Not Detecting Anything
If you’re not finding anything, double-check your settings. Ensure the detector is on and sensitivity is set appropriately. Also, consider your location; you might be in an area with no targets or perhaps too much iron trash masking other items. Try a different location or adjust your discrimination.
Accessorizing Your Bounty Hunter Lone Star Pro
While the Bounty Hunter Lone Star Pro metal detector is capable on its own, a few accessories can significantly enhance your detecting experience and boost your finds.
Pinpointer: The Essential Companion
A good pinpointer is arguably the most important accessory. Once you’ve dug your plug, a pinpointer helps you locate the target within the removed soil or the hole quickly and accurately. This saves immense time and reduces frustration, especially in trashy areas. Many brands offer excellent options, such as the Garrett Pro-Pointer AT or the Nokta Makro PulseDive.
Digging Tools: Make Recovery Easier
Investing in quality digging tools is crucial. A sturdy trowel, a digging stick with a serrated edge, or a specialized sand scoop for beach hunting can make recovering targets much easier and cleaner. Remember to always practice responsible digging and fill your holes.
Headphones: Hear Every Signal
Metal detecting can be noisy, especially in windy conditions or near traffic. Headphones block out ambient noise, allowing you to hear faint target signals more clearly. This can be the difference between finding a deep coin and missing it entirely. Look for headphones specifically designed for metal detecting, which are often durable and comfortable.
Carrying Bag and Protective Cover
A durable carrying bag protects your detector during transport and storage. A coil cover will shield the search coil from scratches and impacts, extending its lifespan. These simple items help keep your gear in top condition for years of use.
Where to Hunt with Your Bounty Hunter Lone Star Pro
Choosing the right location is paramount to success with any metal detector, including the Bounty Hunter Lone Star Pro. Different environments yield different types of finds.
Parks and Recreational Areas
These are often the most accessible and productive locations for beginners. Look for older parks, especially those with established trees, benches, or old playground equipment. Coins, jewelry, and small trinkets are commonly found here. Always check local ordinances regarding metal detecting.
Beaches: A Treasure Trove
Beaches offer a unique hunting experience, with the potential for lost jewelry and coins. The sand can shift, revealing targets that have been buried for years. Saltwater beaches can be more challenging due to mineralization, but waterproof detectors and coils can handle them. The Lone Star Pro’s stock coil isn’t submersible, but the detector itself can be used in damp sand near the water.
Old Home Sites and Historical Locations
For relic hunters, researching old property deeds and historical maps can lead you to forgotten homesteads or settlement sites. These locations can yield buttons, tools, coins, and other artifacts from past eras. Always obtain explicit permission before detecting on private property, and be aware of regulations on public historical lands.
Schoolyards and Sports Fields
These areas are goldmines for lost coins, especially older pennies and quarters. Children often drop pocket change, and sports activities can dislodge items. Again, ensure you have permission and adhere to any school or facility rules.
Bounty Hunter Lone Star Pro vs. Competitors
When considering the Bounty Hunter Lone Star Pro metal detector, it’s helpful to see how it stacks up against other popular options in its class. While many detectors offer advanced features, the Lone Star Pro excels in its specific niche.
Simplicity and Ease of Use
Compared to some higher-end detectors that can have complex menus and multiple ground balance settings, the Lone Star Pro is remarkably easy to set up and operate. This makes it a clear winner for those who want to start detecting immediately without a steep learning curve.
Price Point
The Lone Star Pro is typically priced very competitively, often falling into the entry-level to mid-range budget category. This affordability makes it accessible to a wider audience compared to detectors that can cost upwards of $500 or more.
Performance for Essential Finds
While more advanced detectors might offer greater depth or discrimination capabilities in highly mineralized soil, the Lone Star Pro performs admirably for finding coins, jewelry, and common relics in typical park and yard conditions. Its limitations become more apparent in challenging environments like heavily trashy sites or extreme mineralization.
Conclusion: Your Treasure Hunting Journey Begins
The Bounty Hunter Lone Star Pro metal detector is an outstanding choice for anyone looking to embark on a treasure hunting adventure or expand their detecting hobby without a significant financial outlay. It simplifies the process of finding essential items like coins, jewelry, and relics, thanks to its user-friendly design and effective discrimination features. With a bit of practice, understanding of its settings, and a keen eye for promising locations, you’ll be unearthing treasures in no time. Remember to always detect responsibly, obtain permission where needed, and leave your sites cleaner than you found them. Happy hunting!
Frequently Asked Questions
What is the best setting for finding coins with the Bounty Hunter Lone Star Pro?
For coins, I usually start with sensitivity set to medium-high and discrimination set to reject iron but accept pull tabs and foil. This allows you to catch most common coins while filtering out a lot of junk.
Can the Bounty Hunter Lone Star Pro detect gold?
Yes, the Bounty Hunter Lone Star Pro can detect gold, particularly larger gold jewelry. However, it’s not specifically optimized for gold prospecting, which often requires detectors with higher operating frequencies. You’ll likely find gold rings more readily than small gold nuggets.
Is the Bounty Hunter Lone Star Pro waterproof?
The search coil on the Bounty Hunter Lone Star Pro is water-resistant, meaning you can use it in wet grass or damp sand, but the control box is not waterproof. Therefore, the detector should not be submerged in water.
How deep can the Bounty Hunter Lone Star Pro detect?
The detection depth varies depending on target size, type, and ground conditions. Generally, it can detect larger items like coins down to about 6-8 inches in average soil. Smaller items or deeper targets will be more challenging.
What is the difference between Discrimination and Sensitivity?
Sensitivity determines how deeply and broadly the detector searches for metal. Discrimination allows you to ignore specific types of metal, like iron, to avoid digging trash. Too much discrimination can cause you to miss good targets, while too little can result in digging a lot of junk.
Should I use headphones with the Lone Star Pro?
Using headphones is highly recommended, especially in noisy environments. They help you hear faint signals more clearly, which can be crucial for locating deeper or smaller targets.
Where is the best place to hunt for relics with this detector?
Old home sites, abandoned settlements, and historical event locations are typically the best places for relic hunting. Researching local history will guide you to promising spots. Remember to always seek permission before detecting on private land.
